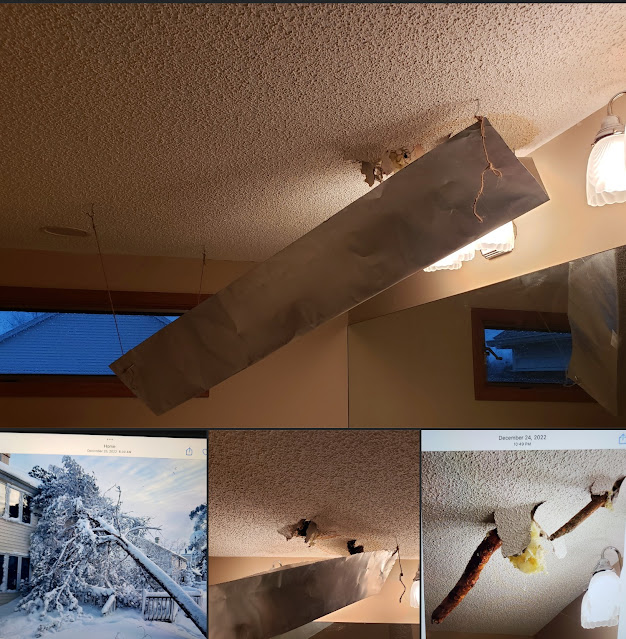
First: Don't panic! The most important thing you can do is gain control over the situation. That starts by poking a hole in the ceiling and letting the water out. Make sure you have a bucket, a trash can. The goal here is control where the water goes. You may not be able to stop the flow, but if you can control where that flow goes, you can minimize the damage. Let the Water Out! A screw driver works well, or in the case above- a tree branch! The ceiling is completely saturated, so creating a hole is easy. A small hole, is cheaper and easier to fix, than a big hole. Often times with water-damage, the drywall panel will warp necessitating replacement of a larger area, but you don't want to get into the level of demo right now. Small hole is all that is needed, or a bunch of small holes. I have personally removed over 6 gallons of water from a dripping ceiling by poking holes in it. This is something you can do yourself. If you don't have a ladder and can't reach the ceil
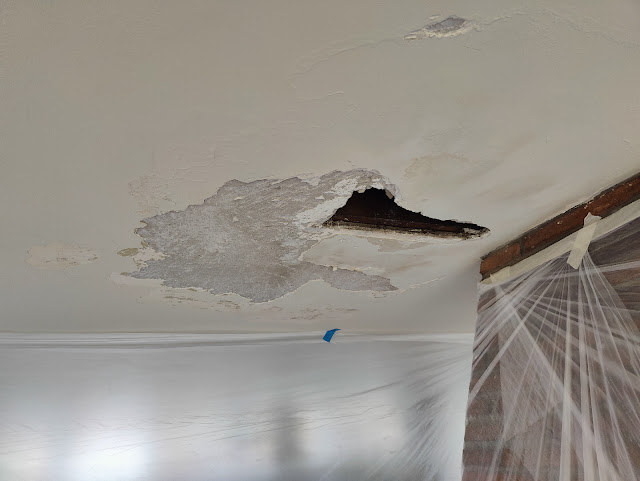
Water Damage Plaster Ceiling Repair This home in Snyder, NY had a water leak around their fireplace chimney. This is actually quite common, the masonry of the chimney, reacts to temperature changes differently than the surrounding structure. This has been an on going leak spanning many years. We removed the water damaged plaster and drywall compound (from a previous repair) as well as chipped off the pealing paint. 60 years of paint, often will lose adhesion to the glass like finish of the plaster. So while a ceiling or wall may appear to be intact, after suffering water damage, chip the paint and it may all peal off with a sharp putty knife. You often can't tell by just looking at it. Using Drywall to Repair Plaster Since this area was previously repaired using drywall compound, we used drywall compound to fix it. Sometimes you can get away with using plaster to repair these previously repaired areas, however due to the paint issues (pealing) we opted to use compound instead. F
Plaster Repair in Amherst, NY Carrigan Painting is the only local painting company specializing in plaster repairs At Carrigan Painting, we specialize in plaster repairs like this one. Trying to capture this plaster damage in photos proved more difficult than I anticipated. Anyways we removed the loose plaster, and the rotted out metal lath from a previous repair The metal lath is from a another plasterer (probably my dad) from a long time ago (decades). Looks like they forgot to load basecoat on his truck, because the previous plasterer did the entire repair with finish coat plaster. That is why the wood lath is white. We had to be careful as there wasn't much holding up this ceiling. Most of the plaster keys were broken, and the lath nails rotted away. This was obvious due to the movement of the previous repair. Plaster isn't supposed to move when you push on it. Once the old plaster was removed, we installed metal lath directly to the existing wood lath. Almost all of ou