Plaster Restoration and Painting of Small Foyer in Snyder NY.
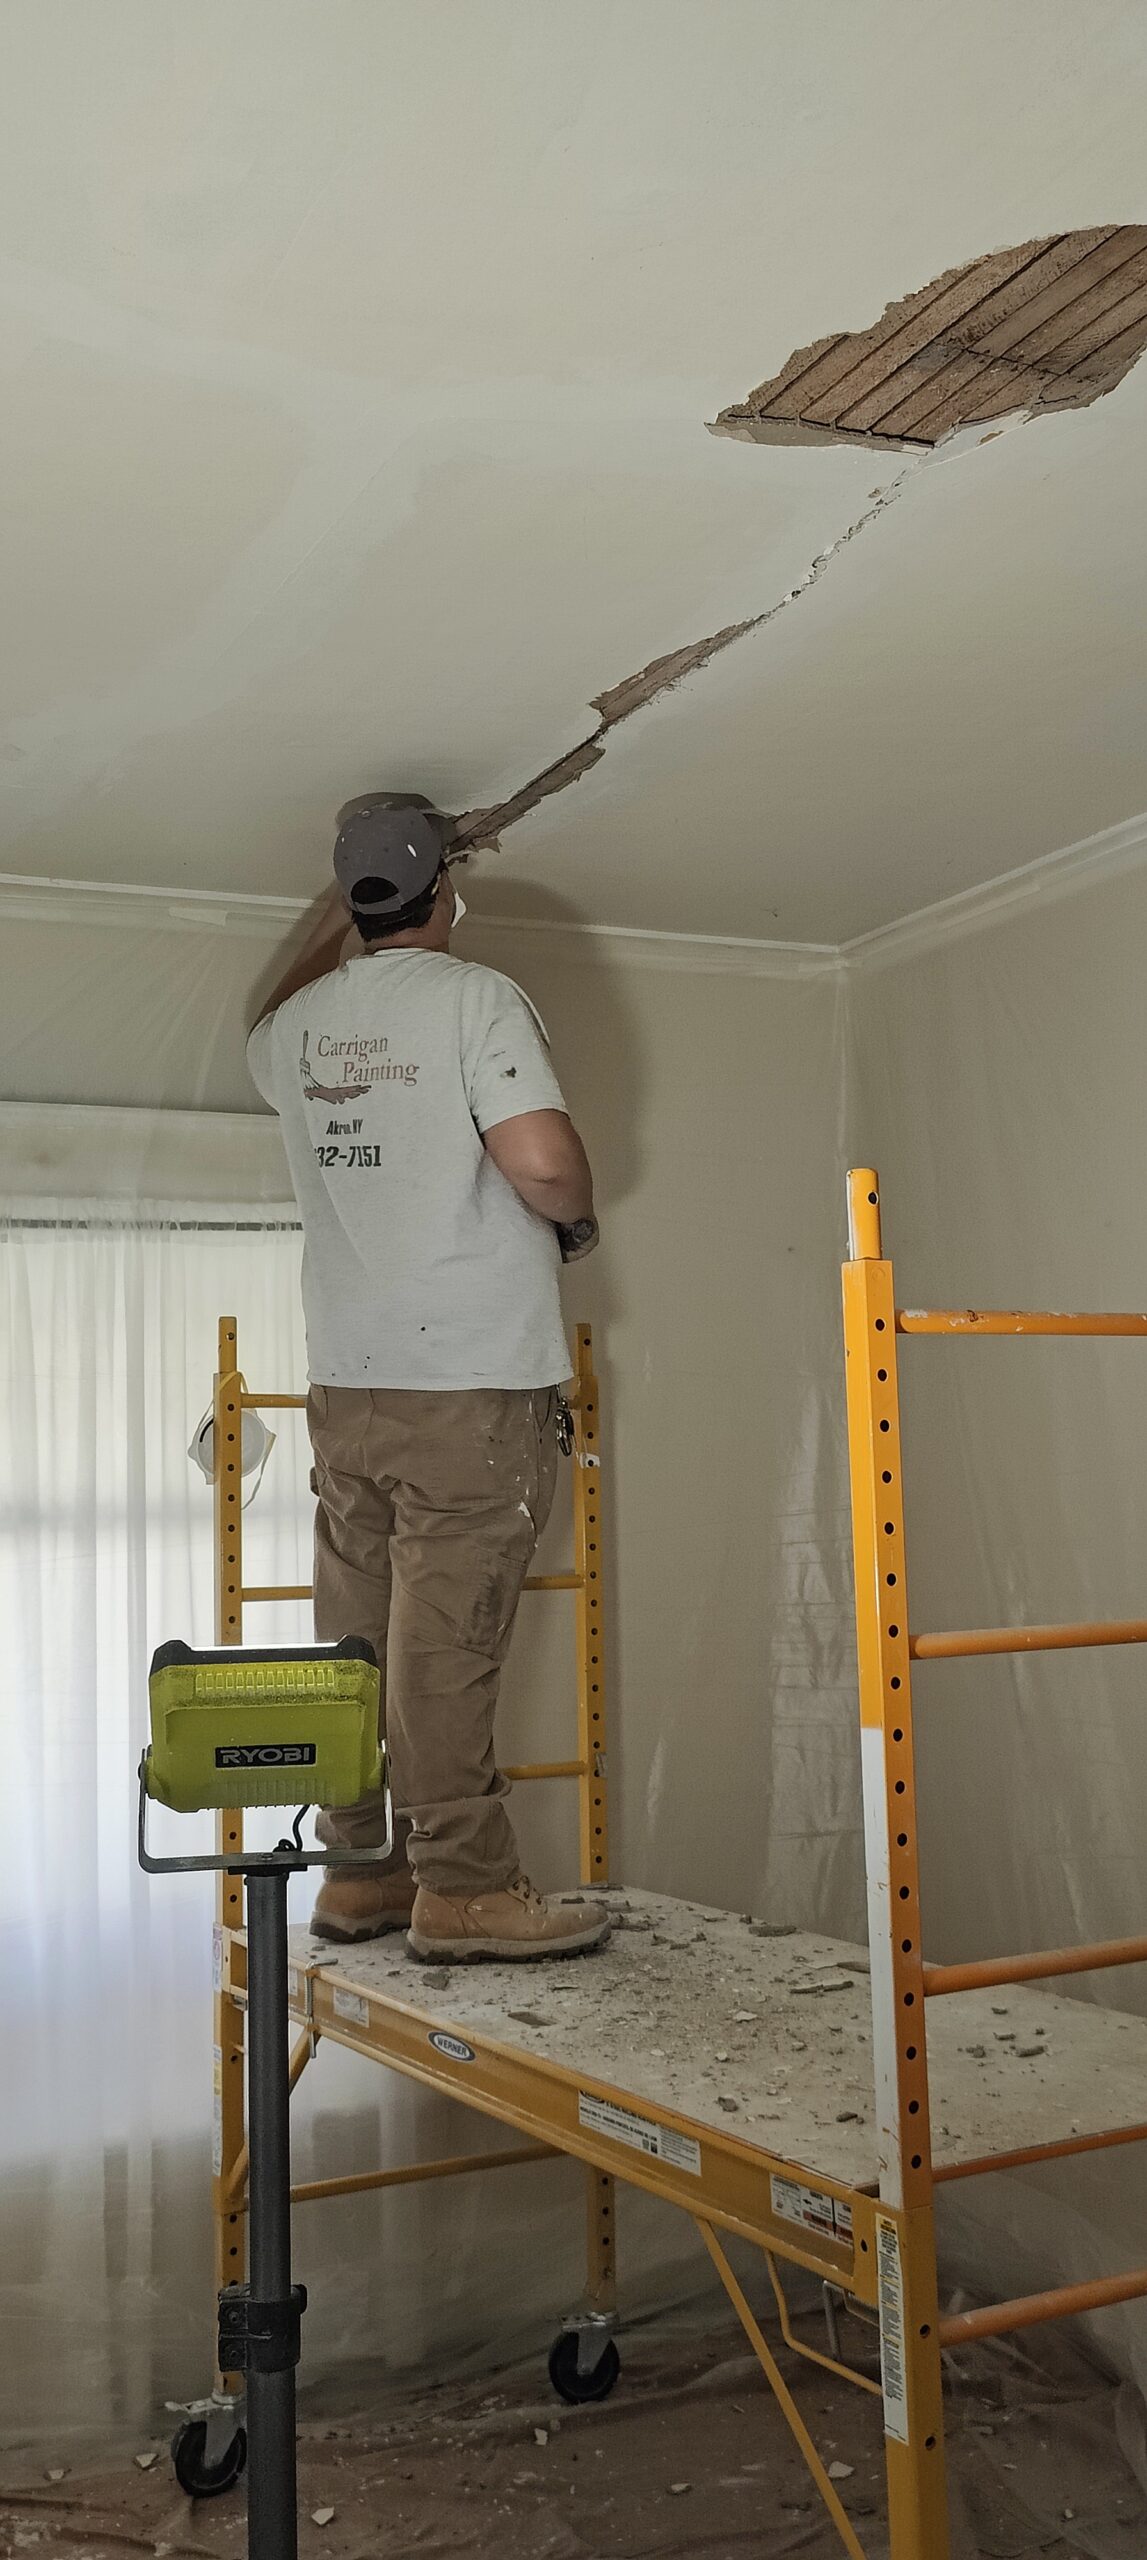
Trying to capture this plaster damage in photos proved more difficult than I anticipated. Anyways we removed the loose plaster, and the rotted out metal lath from a previous repair
The metal lath is from a another plasterer (probably my dad) from a long time ago (decades). Looks like they forgot to load basecoat plaster on his truck, because the previous plasterer did the entire repair with finish coat plaster. That is why the wood lath is white.
We had to be careful as there wasn’t much holding up this ceiling. Most of the plaster keys were broken, and the lath nails rotted away. This was obvious due to the movement of the previous repair. Plaster isn’t supposed to move when you push on it. Once the old plaster was removed, we installed metal lath directly to the existing wood lath. Almost all of our competition will either install thin drywall over the wood lath or worse- remove the wood lath to install drywall.
The pink stuff is special plaster glue. You would think after 50 years they would include handles on their 1 gallon cans!
/end rant
The next photo shows the basecoat. We applied this directly over the metal lath.
Here is a progression picture. I stopped at this point to ensure both angles were set prior to finishing the ceiling – about 30 minutes. In this photo, the dark brown on top is basecoat, and the white, is plaster finish.
Finished.
We noticed some cracks, that weren’t originally in the bid directly to the left of this damage, that we just went ahead and repaired as well. Why not we are already on site, and its not that much.
Next step is to apply texture, and then in 2 weeks, we will prime and paint the foyer. The homeowner is trying to restore the home to its original condition, so they opted to keep the heavy texture that is on the walls. Its easier, to re-texture the surfaces once the patchwork is completed.
The white borders around the patches is dried lime-water. Its from using a large brush with water to finish the plaster patches. After this stage, next step is texturing. No more dust and dirt. No sanding. If we weren’t adding texture, the next step would be to prime and paint it once its dry..
Update 3-25-24:
Patch has been drying for 2 weeks. We primed the patch with oil base primer and then applied (2) coats of paint to the ceiling and walls.
Ceiling was painted with PPG Speedhide UltraFlat Walls were painted with Behr Scuff-Defense Cinnamon Tea Eggshell
To repair this with drywall, would have taken 2x as long with a lot more dust and dirt.
We offer free quotes to repair this kind of damage all over western NY. (except the City of Buffalo) If you would like to schedule a quote, give us a call or shoot us a text! 716-697-3560
I founded Carrigan Painting in 2010 in Amherst, NY. I am a third-generation plasterer and painter. My company specializes in residential repaints and substrate repairs. I created The Carrigan Archives which is organized by service and by town, reflecting both the range of work performed and the areas we serve. It currently includes over 125 case studies and more than 2,200 project photos which are located with in their respective case studies. I personally wrote all the content. AI is not used for content generation.
The Carrigan Archives was created as a way to document our work outside of social media. What began as a simple portfolio has grown into the largest collection of project photos and case studies focused on interior painting, ceiling repair, and drywall and plaster repair, ever created in Western New York. The Carrigan Archives isactively maintained and reflects actual jobs, not staged examples or stock imagery.
Most projects are documented from start to finish by myself and my staff to give homeowners the context needed to evaluate professional workmanship before hiring a contractor. The focus is transparency: how problems are identified, how repairs are approached, and the level of care applied throughout the process.