Today we began a project in Cheektowaga NY (Cleveland Hill), repairing water damage to a plaster ceiling and wall in a living room. At Carrigan Painting, we specialize in ceiling repair. Below, we detail our process from start to finish, from restoring the water damaged plaster, and skim coating the ceiling to repairing plaster cracks the right way. There are 20 photos of our process for this phase of this two phase project,
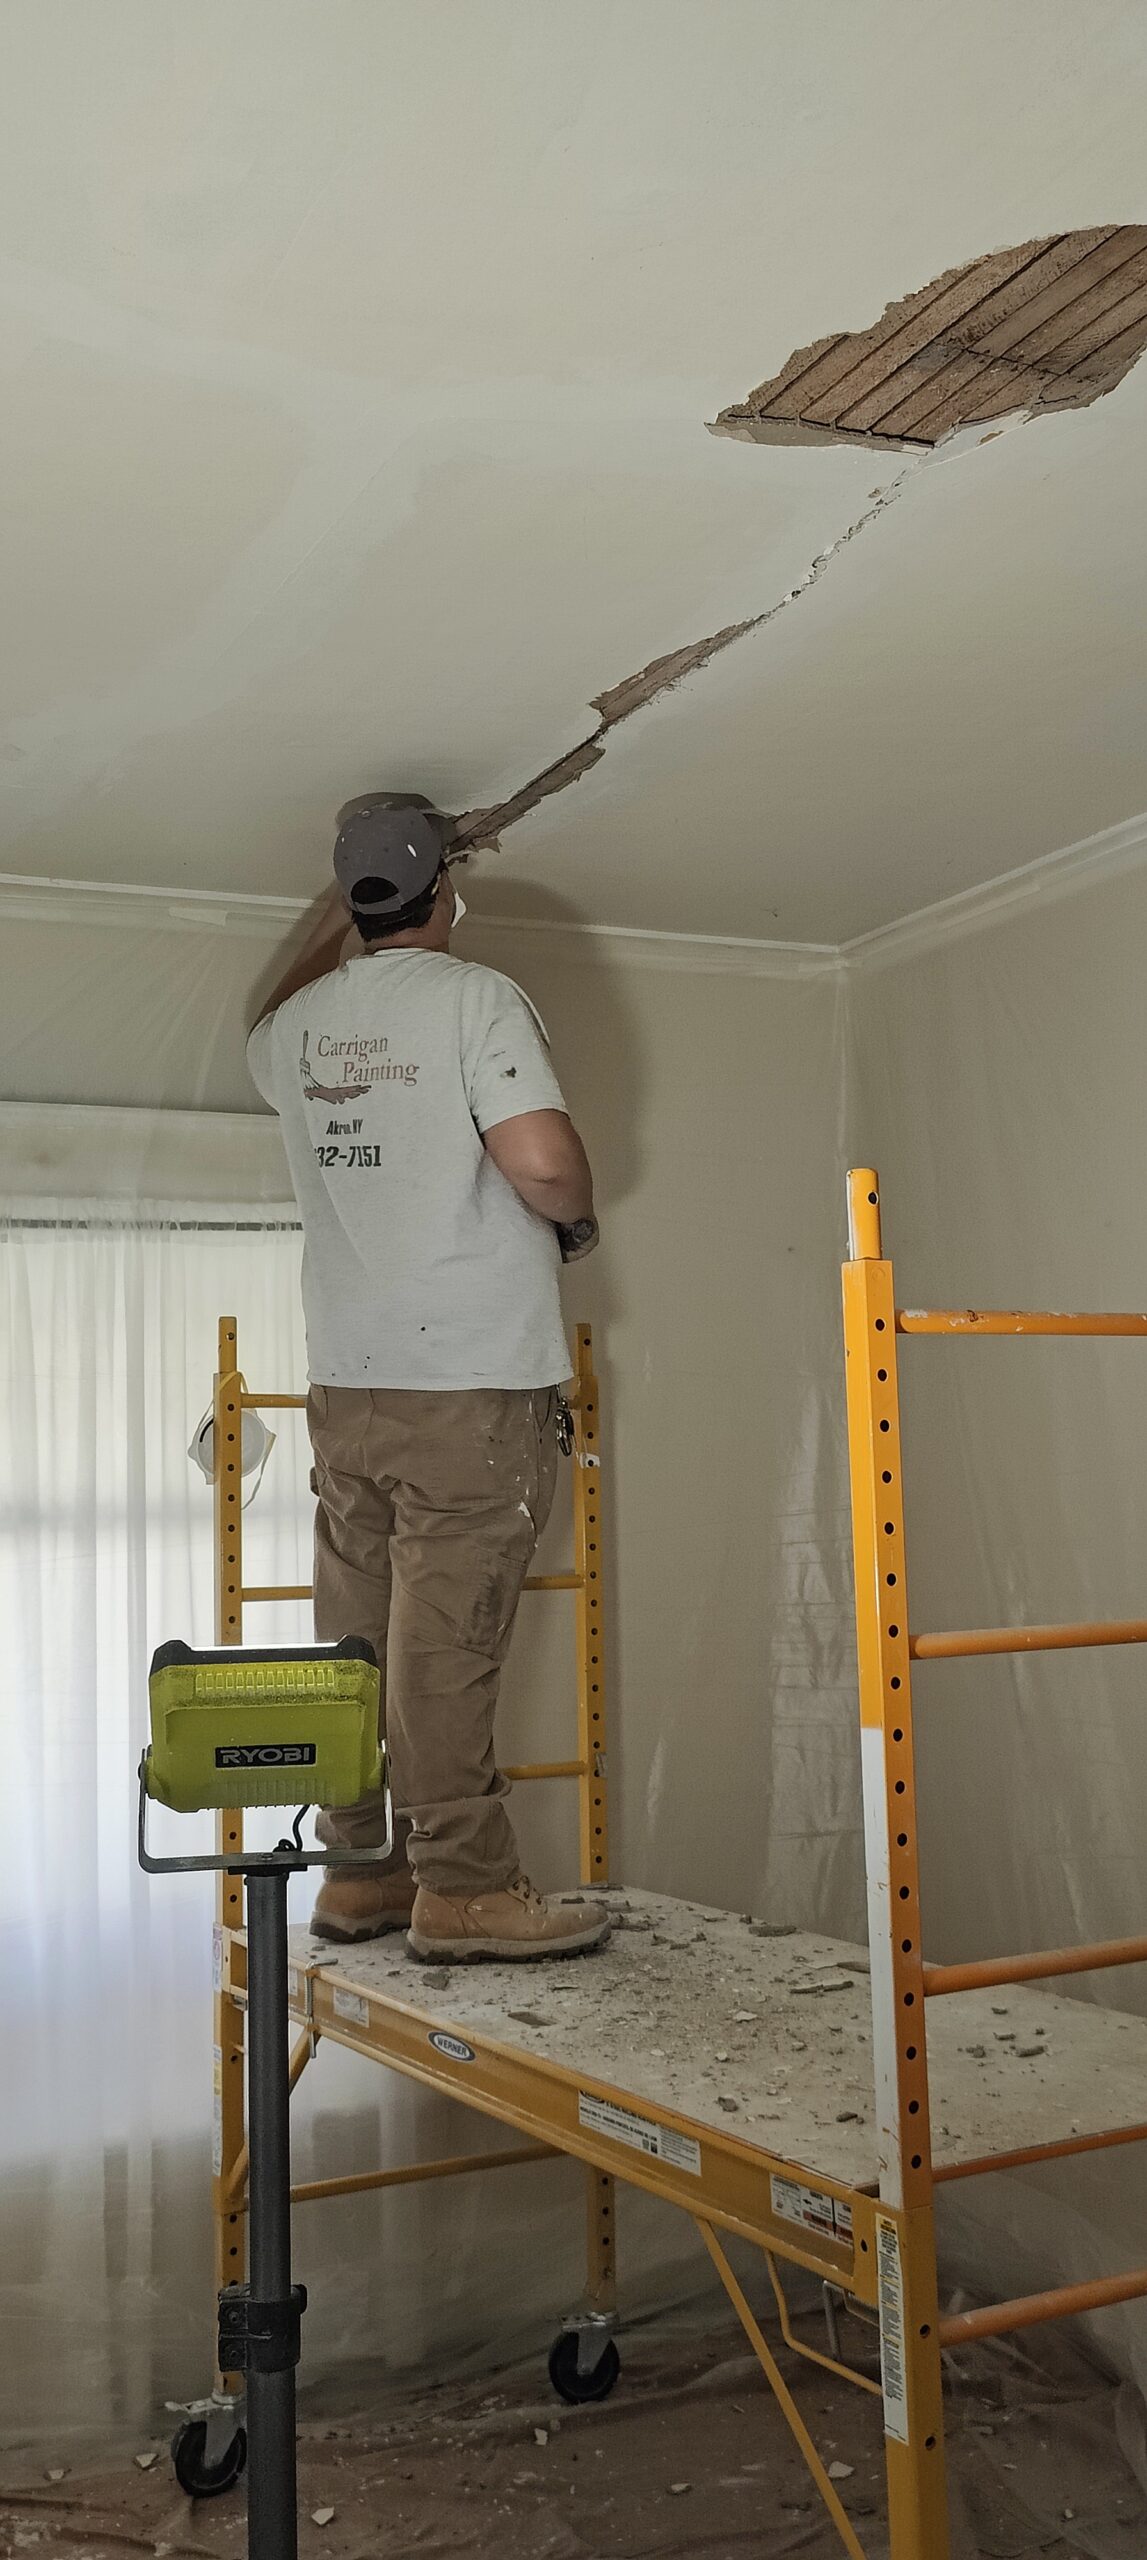
We began by putting down rubber backed drop-cloths and creating a dust containment box around the repair. Then we began carefully chipping away at the water damage with a hatchet. We are not randomly pounding the wall and ceiling, instead we are skillfully tapping the plaster to remove the loose, damaged material. The idea is to not punch a hole through the rocklath.


This area had been repaired at least once before by someone who wasn’t quite sure what they were doing. Their material of choice looked to be that “Plaster in a tub” stuff made by DAP. We removed it all, and removed the plaster finish below it. It appears to me like someone attempted a plaster repair, broke through the rocklath, panicked and packed it with the goop from DAP. Which doesn’t go very hard by the way, as we removed most of it with a putty knife.
We removed the broken rocklath, squared off the hole, and then replaced it with a piece of blueboard. Then coated everything in the pink stuff – which is a special glue, that promotes the adhesion of new plaster to old plaster. Applying this to a patch, actually makes it more difficult to get the plaster to stick.


We seem to have skipped a couple of steps in our pictures. 🤦♂️ We applied plaster basecoat over blueboard, to bring it up to the surface of the existing basecoat. This prevents a high spot in the patch, and makes keeping it flat a lot easier. Also, packing 1/2″ of finish over such a large area, can lead to check-cracking. While that was setting, we broke for lunch.
When we got back from lunch, the basecoat was still not set. So we started with the ceiling, to give the wall more time to firm up. We mixed up lime putty and plaster of paris, and then applied it to the ceiling, and finally the wall. By the time we got to the wall, the basecoat was firm, it was still setting. We will see if the finish holds tomorrow.. It should, but if it doesn’t we will redo it. This basecoat can sometimes take hours to set. You’d think USG would standardize it across every bag.


We are repainting the entire room, so I saw some areas next to the fireplace that I didn’t like, so I fixed those areas as well. The reason the basecoat isnt finished is because it was 4pm, and the basecoat was still too soft to finish. Stacy feeling left out from all the fun I was having, filled in the area next to the fireplace that I chiseled out, with durabond.


Skim Coating
On day 2, we pole sanded the ceiling, which has a light sand swirl texture that has been painted multiple times, so its no longer very evident. Add 60 years of random patching, and the ceiling overall isn’t very pretty. So the homeowner opted to have us skim coat the ceiling, and turn it into a smooth ceiling.


Ms Stacy has become quite skilled with her knives.


There have been numerous patches above the fireplace on the wall, creating some ugliness that we didn’t like, so we skim coated the area to smooth out the wall so it looks better once painted.


Plaster Crack Repair
Since we are painting the walls, we repaired all the damage to the walls that we found. This included repairing small plaster cracks. As well as rectifying a minor paint issue.. We began prepping the cracks for the repair, this is the level that most painters stop at, as this is about the limit of a 5in1 painters tool.


We don’t want these cracks to come back, so next is to get out a hatchet, and skillfully chisel open the cracks for a proper repair. This is the part that most painters are incapable of doing for two primary reasons: 1) Most painters do not have a hatchet on their trucks (we carry an assortment), 2) They lack the skill to chip out the plaster with out punching a hole in the wall.


After applying a bonding agent to the cracks, we filled the cracks with lime and plaster of paris, and reinforced it with fiberglass mesh tape. This repair method is superior to that of using drywall compound such as durabond. However, using real plaster, has other nuances that sometimes make it impractical to use.


Plaster doesn’t shrink like drywall mud, so we dont have to feather it out like a drywall patch. This is another benefit to a plaster patch in a plaster wall or ceiling. Plaster affords a truly seamless patch, whereas drywall patching can sometimes (often) creates a bump.
Now that everything is repaired, we have to wait about a week for everything to dry. Also, due to the homeowners schedule we can’t finish for a couple of weeks. So this wraps up part one of this project.
Update 4-20-26: Part II has begun, Skim Coating and Painting