Another ice dam related water leak. This time in Snyder NY. The homes in this area are prone to ice dam related water leaks unless mitigation steps have been taken. Such as wires on the roof and gutters, and getting insulation into difficult to reach areas. This problem affects most of the split level homes. The front of the house, and the 2nd floor back of the house above the attached garage are prone to major ice dams. We know this from experience.
In this case, the water leaked through an inaccessible area of the roof/dormer. The ceiling in question is the kitchen ceiling. The previous owners, who flipped the house, installed a dropped ceiling instead of repairing the existing water damage- they decided to just hide it instead!
Well the new owners, noticed new stains, so after getting the water leak(s) rectified, we came in to remove the drop ceiling, and make an assessment of the existing plaster ceiling above it. Not knowing what we would find, bidding such unknowns – a rarity for us. Anyways, this is our process..
Before


Problem areas:


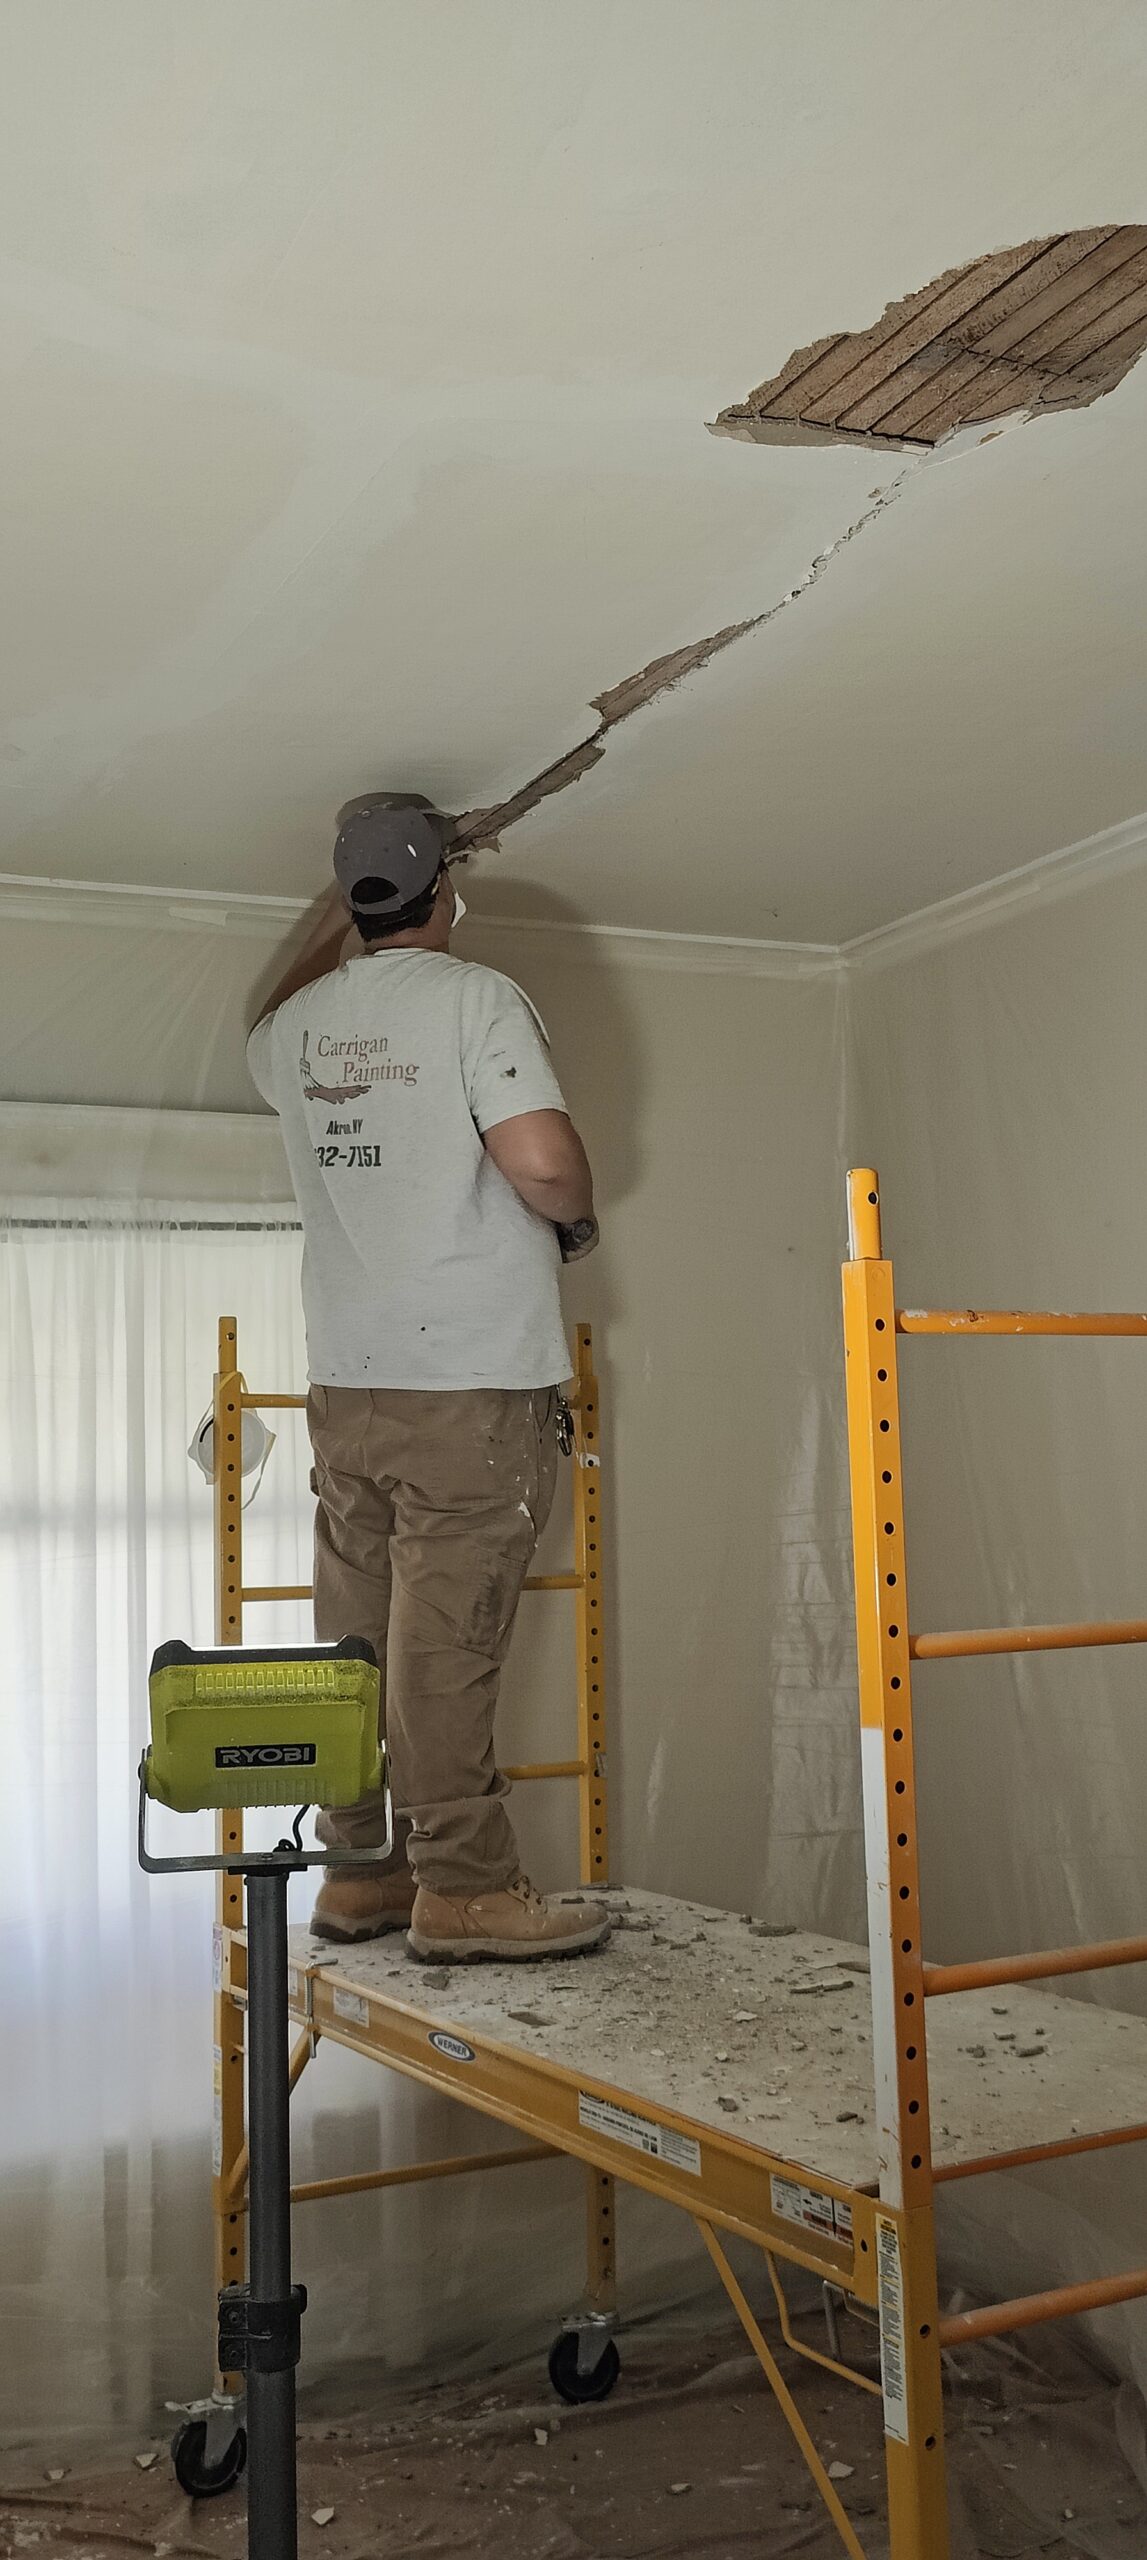
This type of ceiling is pressed paper, like cardboard. To get us started, I tapped an area with a hatchet to creat a hole, so we could remove the tiles one by one.


Once all the tiles were removed, next is to remove the wood ferring strips – with out destroying the ceiling which is actually in pretty good shape, all things considered.
We used a crowbar, and a hatchet, to remove the strips.


At this stage, we did some basic prep of the pealing paint, and water damage to the plaster. Then cleaned up for the day. Tomorrow we will remove the furring strip above the oven. For some odd reason there are no blades for the oscillator on the truck – weird, so I picked some up today so we can cut the nails.
The plan is to install some trim above the existing crown. And restore the plaster ceiling.https://www.carriganpainting.com/services/plaster-repair
More to come! (tomorrow)
Day 2
Today is plaster repair day. Given that some of this water damage is decades old, who knows what we will find. However these homes in Snyder, are built very well. So after 3 hours of chipping, scraping, chipping some more… right arm left arm… back and forth… more chiselling the loose and damaged plaster.
This is a rocklath plaster home. The goal is to remove just the finish coat, not smash through and make a hole. Instead of putting in a piece of drywall, we will restore the ceiling. The finish coat in these homes is a lime based plaster. We are using a lime based plaster to repair the damage.
We also opened up the ceiling cracks we discovered.


Once that was completed, we decided at that point that it would be best to just glue the whole ceiling. While that was drying, we went to lunch.


Once that was fully dry across the ceiling, we mixed up some plaster finish coat which goes harder than durabond, and is the same type of plaster that was used in the home originally.


There were 25 or so nail holes in this ceiling (I forgot to count them all) from the furring strips for the tiled ceiling. The strips were held in place with 8D nails. Which is ok we keep crowbars on the truck. Strangely, we do not have a normal hammer on the truck.
We also finished the big patch, fixed the cracks, and purposely left the big plaster patch a little more rough than usual. This is because tomorrow, when we skim coat the ceiling, we want the compound to stick the the plaster. Normally plaster patches are so smooth paint rollers slide instead of rolling. It can be annoying when priming.

We ran out of plaster finish. I thought we had more on the truck. No worries, I put more on tonight.


A couple more photos. The stains bleeding through, is normal. We are going to prime the entire ceiling with oil.


Day 3:
We came in and finished off the patching of the ceiling, and then skim coated the entire ceiling. This is one of two passes we are making. We decided to skim coat the ceiling, due to the 25+ small patches from the nails used to hold up the furring strips.


The ceiling is heavily stained. And is bleeding through the skim coat. This isn’t a problem as we are priming the ceiling with oil base primer.

It Friday, and these folks have young children in the home, so to give them their kitchen back for the weekend, we did a complete clean out of all of our tools and equipment, and ran the swiffer around so they could at least have some normalcy while their home is being worked on

Day 4: – Monday
Today we sanded the ceiling, and then primed the ceiling with oil primer. Our go to primer for projects like this. Seals all the stains, and locks in the skim coat to the ceiling. It also shows us all the imperfections in our work. We are not perfect.


While the primer was drying, we went over to Lenco in Williamsville (Off Sheridan) to pick out some wood trim and explore some options as to how to fill in the gap between the crown and the ceiling now that the dropped ceiling is removed. We are not carpenters.


We selected 3 different pieces of trim, 3 different styles and size. After getting back to the job, we determined which piece would work, so back to Lenco to buy more. Then back to the shop to prime all the pieces with oil primer so they are ready to go for tomorrow.
Day 5:
Our carpenter installed some new custom crown –

Day 6:
After the crown was installed, we primed, caulked, and puttied. Then painted the crown 2 coats. We also had some minor touchups on the ceiling from the installation of the custom crown, so we can back for an hour on day 6, to put the final touches on everything.


The problem area:
Before, During, After.