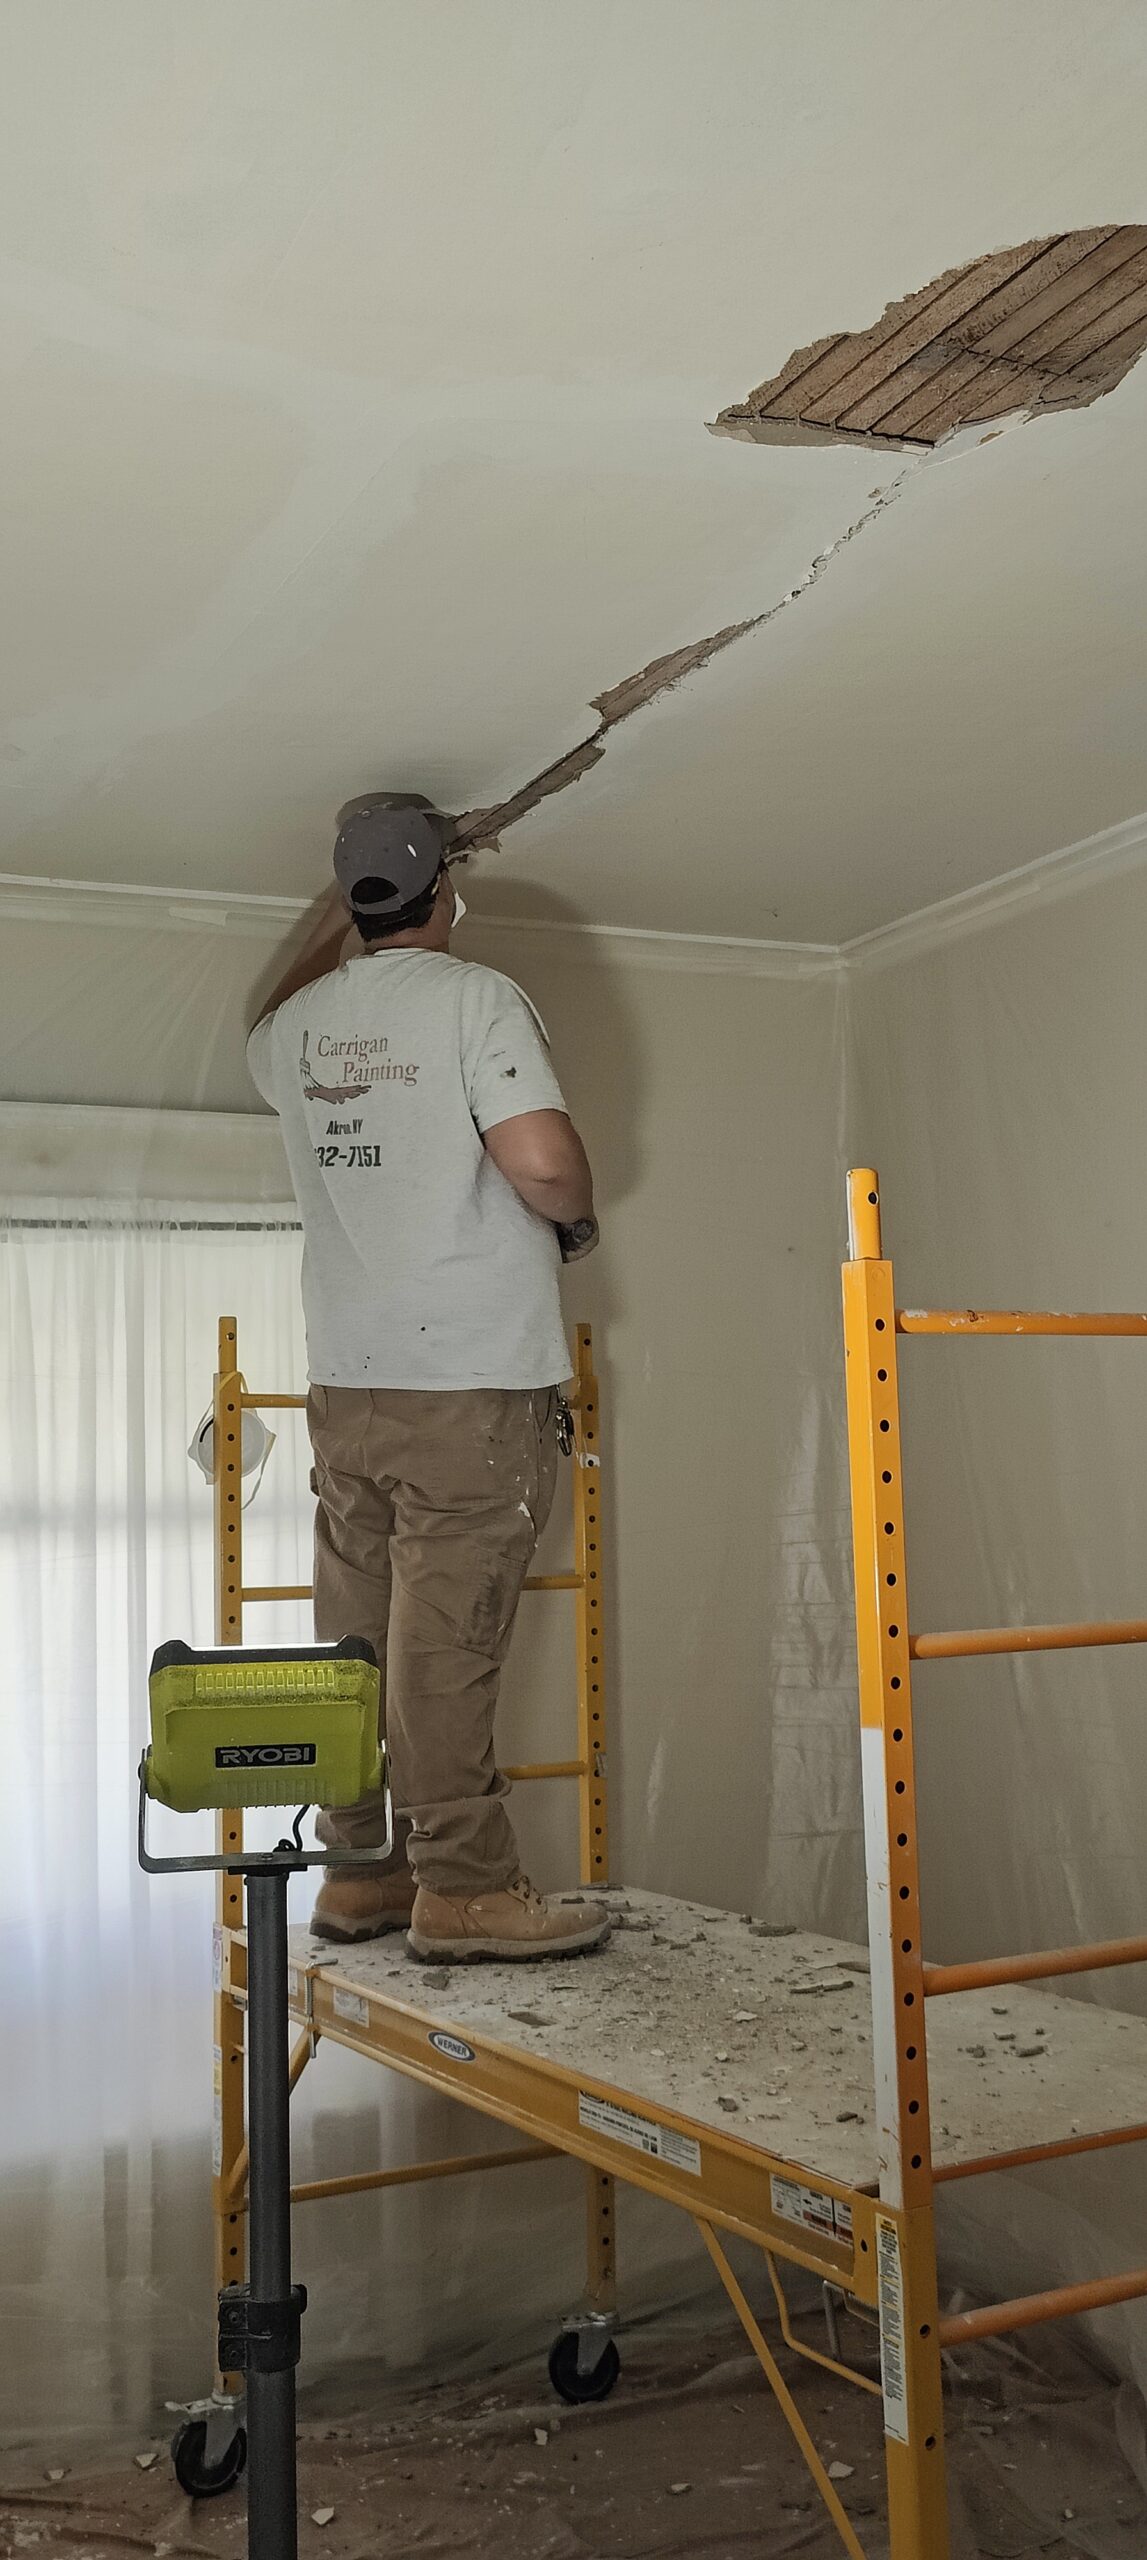
This 1950’s home in West Seneca, suffered a major water leak from a plumbing problem. After repairing the plumbing leak, the homeowner decided to remove the rest of the plaster ceiling, but after struggling to remove it, left about 25% of the ceiling for us.

After laying down drop cloths, we laid down two sheets of OSB to protect the floor from impact damage. Then, using a hatchet and a crowbar, removed the remainder of the ceiling. A reciprocating saw would have been faster, and we do have one on the truck, but we need blades for it. So the old fashioned way..
After the ceiling was removed, we went back and removed the 300 nails from the ceiling joists, and cleaned up the corners. The top corners where the ceiling meets the wall of a plaster home, always contains “debris” in the form of old plaster, and sometimes metal lath.
The corners need to be cleaned up so that the drywall will sit nice and flush (preferably on top of) the existing wall plaster. Doesn’t always happen, but that is the goal.
The reason? When the drywall butts up against the top of the plaster, its not flush fit, so the voids will then need to be filled in with drywall compound, which is a lot softer than the existing plaster. This could lead to corner cracks, or loose tape down the road. By placing the drywall on top of the existing plaster wall, you eliminate any voids, and thus make a stronger corner.
In many plaster homes in WNY, there is plaster corner bead on the inside corners where the wall meets the ceiling. Plaster corner bead has metal lath attached to each side as its embedded into wet plaster, about 3″ on each side. So yes we removed the ceiling, the other half of the corner bead is embedded in the wall. We have tried the oscillator, which does work, but if the blade catches, it vibrates the wall something bad – which can cause new damage.
Hanging Drywall
After hanging the new board, we began finishing the new drywall for painting. Its purple, because it is moisture resistant drywall. All of our new ceilings and repairs, are completed using moisture resistant drywall.


Once the ceiling was finished, and sanded, we primed the ceiling. Then went back over it with our light, and skimmed anything we didn’t like. Given that this ceiling is a little bit wavy, there is a couple bumps.
Also, the walls got wet at some point which caused the paint to blister. So Dave took it upon himself to chip off all the loose paint. These areas were primed with oil base primer, and then skim coated. Then primed with latex primer. That is the white blocks in the following photos..
Painting
The Paint we are using is Behr Dynasty. We had 100% coverage on 1 coat. But per company policy, we always do two coats.


More to come!