Here is another plaster repair, involving a water leak. The winter of 2026 in Buffalo NY was brutal in the sense that the snow and ice didn’t melt, and instead, built up over time, leading to water leaks. The mold abatement people, removed approximately 7′ x 7′ section of the wall and a 3′ x 7′ section of the swirl ceiling. This home, built in the 1950’s is a rocklath plaster home, and the homeowner is adamant about keeping both the house original, and the swirl ceiling. So no drywall allowed.
Homeowner’s insurance is paying for this repair. More about that at the bottom.
At Carrigan Painting, we specialize in this type of work. But matching that swirl.. is going to be fun. Matching swirl over such a large area, is nearly impossible. You have to get the finish, with in about 1 miliimeter of the existing ceiling, with out the texture – before we texture it, and we have no smoothness around the patch to easily check the height. These repairs are always difficult and I have a couple of ideas we might try to try to get the new swirl to match the old.
Ok so on to the pictures:

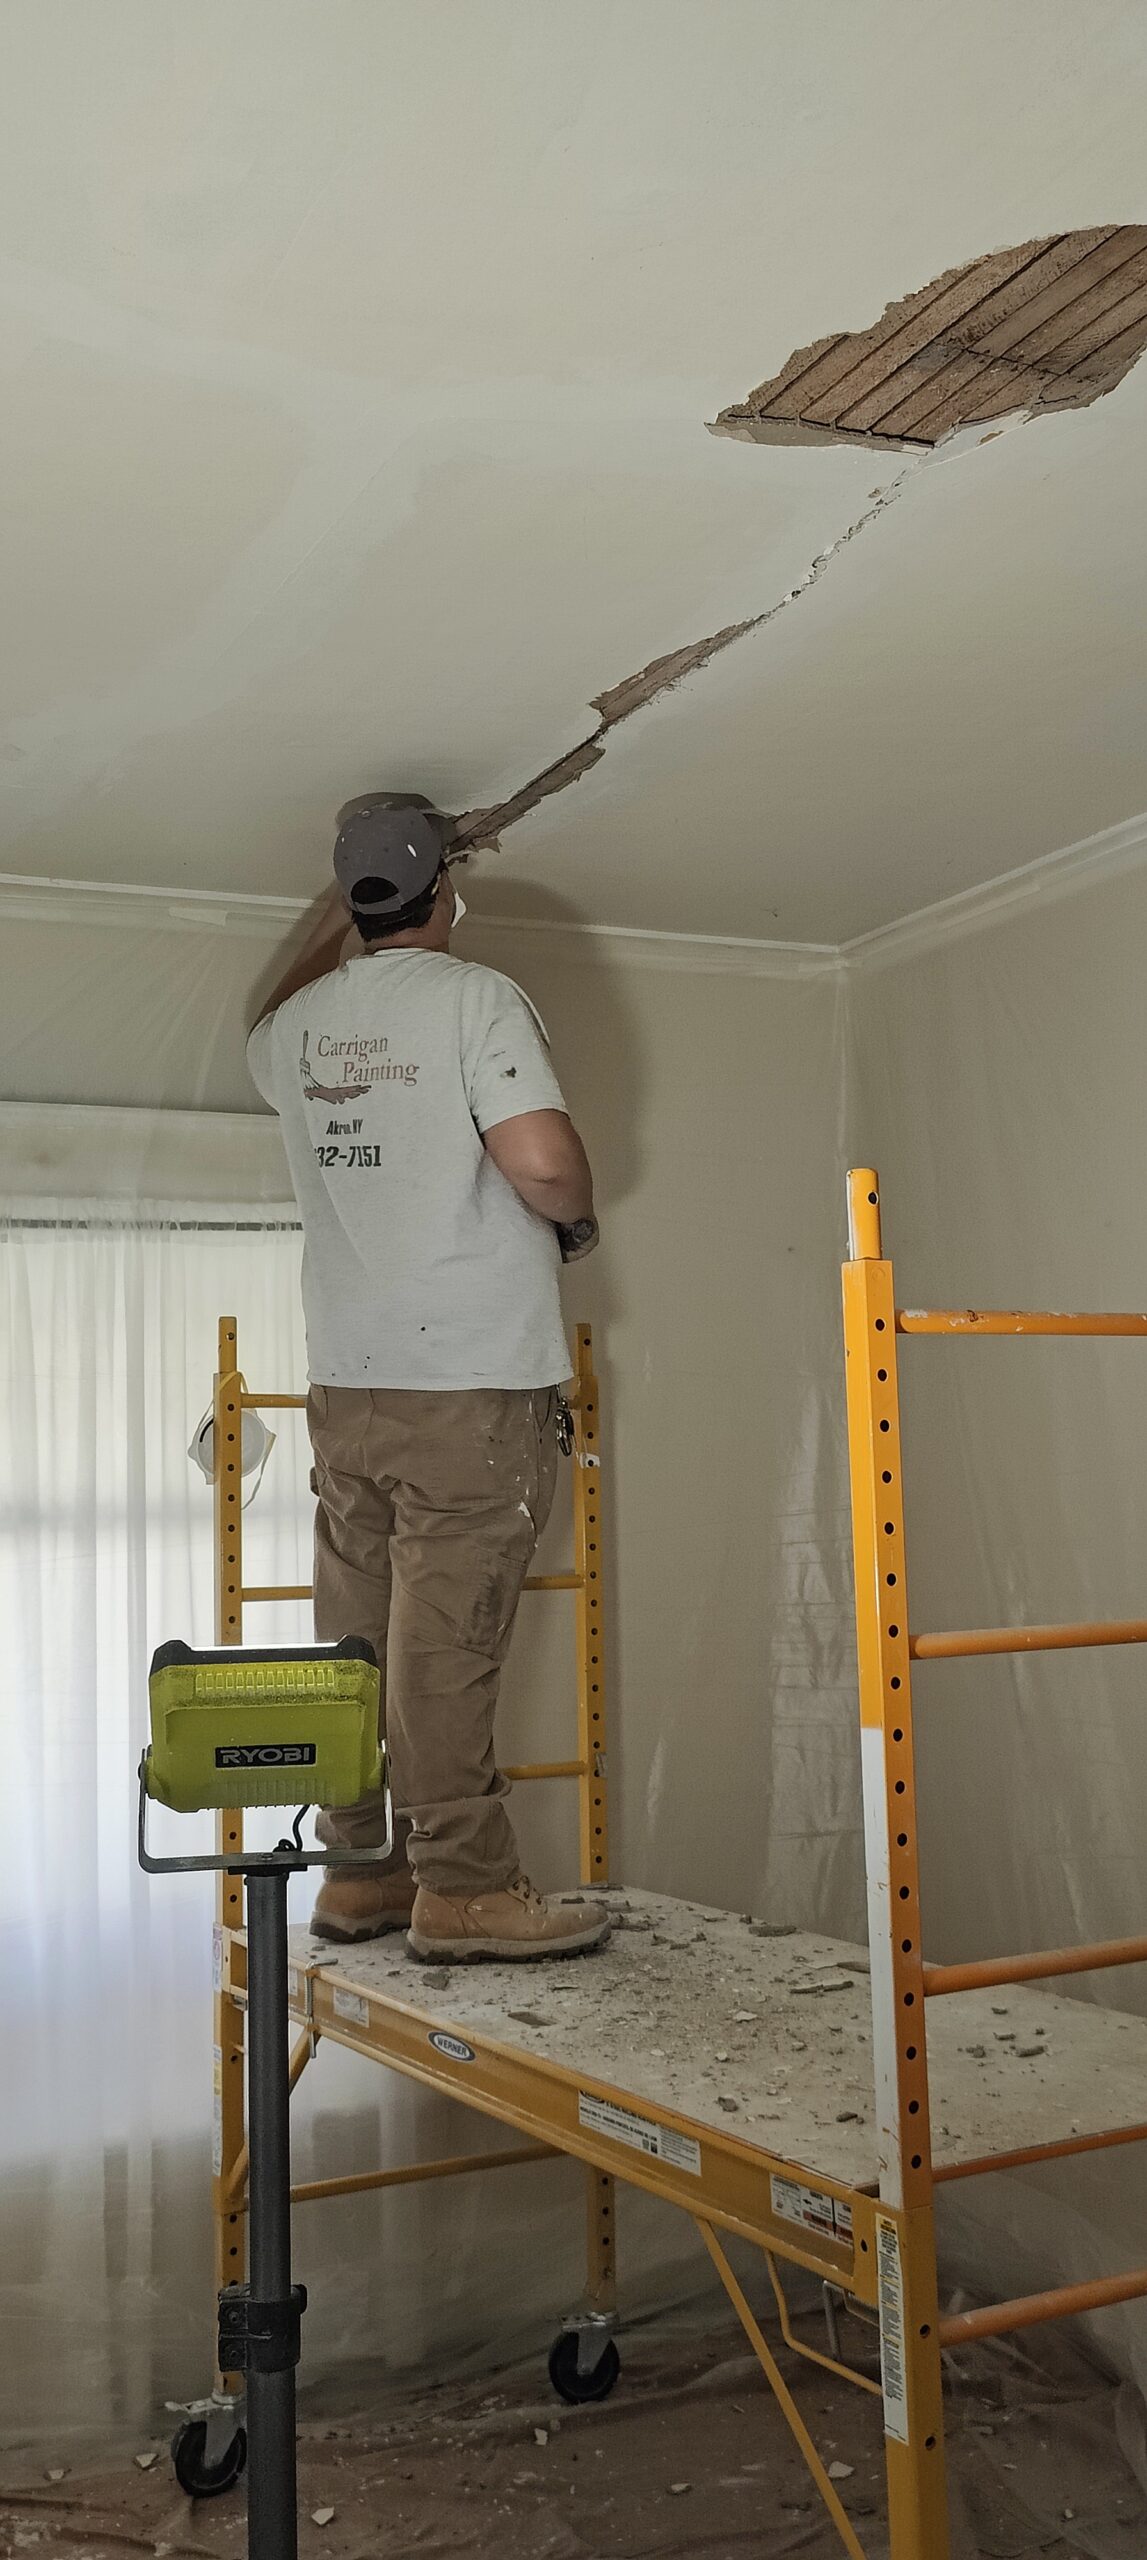
We set up a wall of plastic to partition off our work area, from the rest of the house. This isn’t so much to do with dust, but to contain our mess. Also, plaster has a tendency to splatter, a LOT!


I don’t have an 8′ section of open wall space in my barn to store 8′ sheets, so I had to cut them in half to store the material, also it was 20F outside, so thats why the sheets are different sizes LoL. Its not a problem, just doesn’t look as clean, and it’s a little bit more work on site.
The remediation company, also removed all the insulation, so we are installing new insulation as well. We got a late start to this job, as we were finishing up another plaster restoration and painting project in Cheektowaga NY.
Tomorrow we will finish installing the blueboard, and then install the plaster basecoat. That is not drywall, that is Imperial Board, and its specially made to accept plaster. (And we can no longer get it in Buffalo, ugh!) What makes it different from drywall, is it has a waterproof paper on the face, and has a special coating on the face paper which promotes both a mechanical and a chemical bond between the gypsum board, and the plaster. If you attempt to use drywall with out the right steps, the new plaster will soak through the paper of the drywall, and cause a structural failure of the patch.
Day 2:
After installing the rest of the blueboard, we began setting up to apply the basecoat plaster. The depth we have to fill on the wall, is a little less than 3/4″ with a slight bow outward in the middle. We have to keep that flat, and level, over a 50 sq ft vertical surface, using a material-plaster, that doesn’t like to stick to anything, and has the consistency of warm frosting.
The dots or islands on the wall, are thickness markers for the darby’s. It also allows us to gauge how long it takes the material to firm up, and set. This allows us to better plan our batches of material. Set times across bags of plaster can very wildly in our experience. Sure it says it will set in 90 minutes.. 3 hours later it is still soft. Ugh! So the dots tell us how creative we have to get.


Once the wall was done, we broke for lunch. This gives the material time to stiffin up so its rock hard at the top, where it meets the ceiling. Makes troweling the corner easier.
After lunch, we did the ceiling, paying close attention to keeping the edges clean.. We probably should have done the ceiling first, as by the end of the day, we were pretty tired. The second picture is a progress photo.


Tomorrow we apply the finish coat, and possibly texture the ceiling.
Day 3:
Now that the plaster basecoat is hard and drying, we then apply the finish coat plaster. Because the ceiling is the most important part of this job, we started the day finishing the plaster ceiling portion. This allows the ceiling to fully set over hours, for when we do the swirl later. Below is our setup for finishing this large patch. My favorite finishing trowel sitting atop the plaster, and my finishing hawk on the right. Historically we would use a mortar board and stand, However, those arn’t very sturdy. They work fine, this works better. Plus its on wheels!

Once the ceiling was done (it’s shiny, because its polished), we started on the wall.


When mixing up large batches of plaster like this, its a lot easier and faster to work off a mortar board versus a out of a bucket. For one, I can load my hawk in under 5 seconds off a mortar board, where as with a bucket, that is a 30-45 second ordeal. Also, I can apply an entire hawk full of material, in about 30 seconds. (We timed it)


Once the wall was done, we broke for lunch. After which we started working on the swirl texture. This step took about 4 hours to complete. Every swirl texture is different. Different consistency of the materials will change the texture. Different floats, offer different textures. We have about a dozen different floats, and tried multiple ones to find the correct texture. Then they all have to be cleaned.
The first picture- we thought we had the right float, but after applying the swirl, it didn’t look right. Instead of settling, we scraped it off and started over, before the plaster really went hard.

Once again, Ms Stacy proves she’s better at texturing than I am. Though, in my defense, I did just do all the finishing! She applied the plaster to the ceiling, using my hawk and trowel.. and then textured it. Which is pretty amazing, since most people, can’t even get it off the mortar board with out dropping it all!


The plaster restoration portion of this job is now complete. Due to the thickness of the plaster, we won’t be back for a couple of weeks, to allow adequate time for the plaster to dry, prior to priming and painting the ceiling and wall.
If you noticed the brown ring around the ceiling patch in the photos above, that is a water stain, from the new plaster. Another reason these patches must be primed with an oil primer. The moisture in the new material, disturbs the dust on the ceiling, and creates the stain. That’s actually how all ceiling stains are created.


A before and after photo.

This patch will lighten significantly as it dries. Texturing this ceiling was not easy. Overall it took us 3 tries to get it to where it is. The white around the patches is dried lime water. It will just wipe off with a wet rag.
Insurance Repair
Here is the initial insurance estimate for this job. According to their insurance company, they initially were only budgeting $450 for the repair, and $50 to apply the swirl! They quoted a drywall repair, the homeowner was adamant about the repair being done with plaster. While this could have been done with drywall, $500 for such a large repair, is an insult to skilled trades. Unfortunately, this seem to be the new theme with insurance companies in 2026.

In the above insurance repair estimate, they are doubling up the 1/2″ drywall due to the thickness of the plaster, which is a smidge less than 1″ thick. That means, doubling up the 1/2″ drywall, won’t work. There is 5/8″ drywall, but that is a large area to fill with drywall mud and then you have to sand it, yikes!
After explaining in detail, the work involved in properly restoring this plaster home, their insurance company revised their estimate, to reflect the true cost of restoration ($5,500) versus the pure fantasy they initially came up with.
When we come back in 3-4 weeks, we will prime the wall and the ceiling patch with oil base primer, and then paint the ceiling, wall, and radiator. Why didn’t we tape off the radiator? Because when plaster lands on the tape, like on a radiator like that, it can be very difficult to remove. Its easier in this case, to just paint the radiator.
Update: 5/21/26: We have begun Phase II.