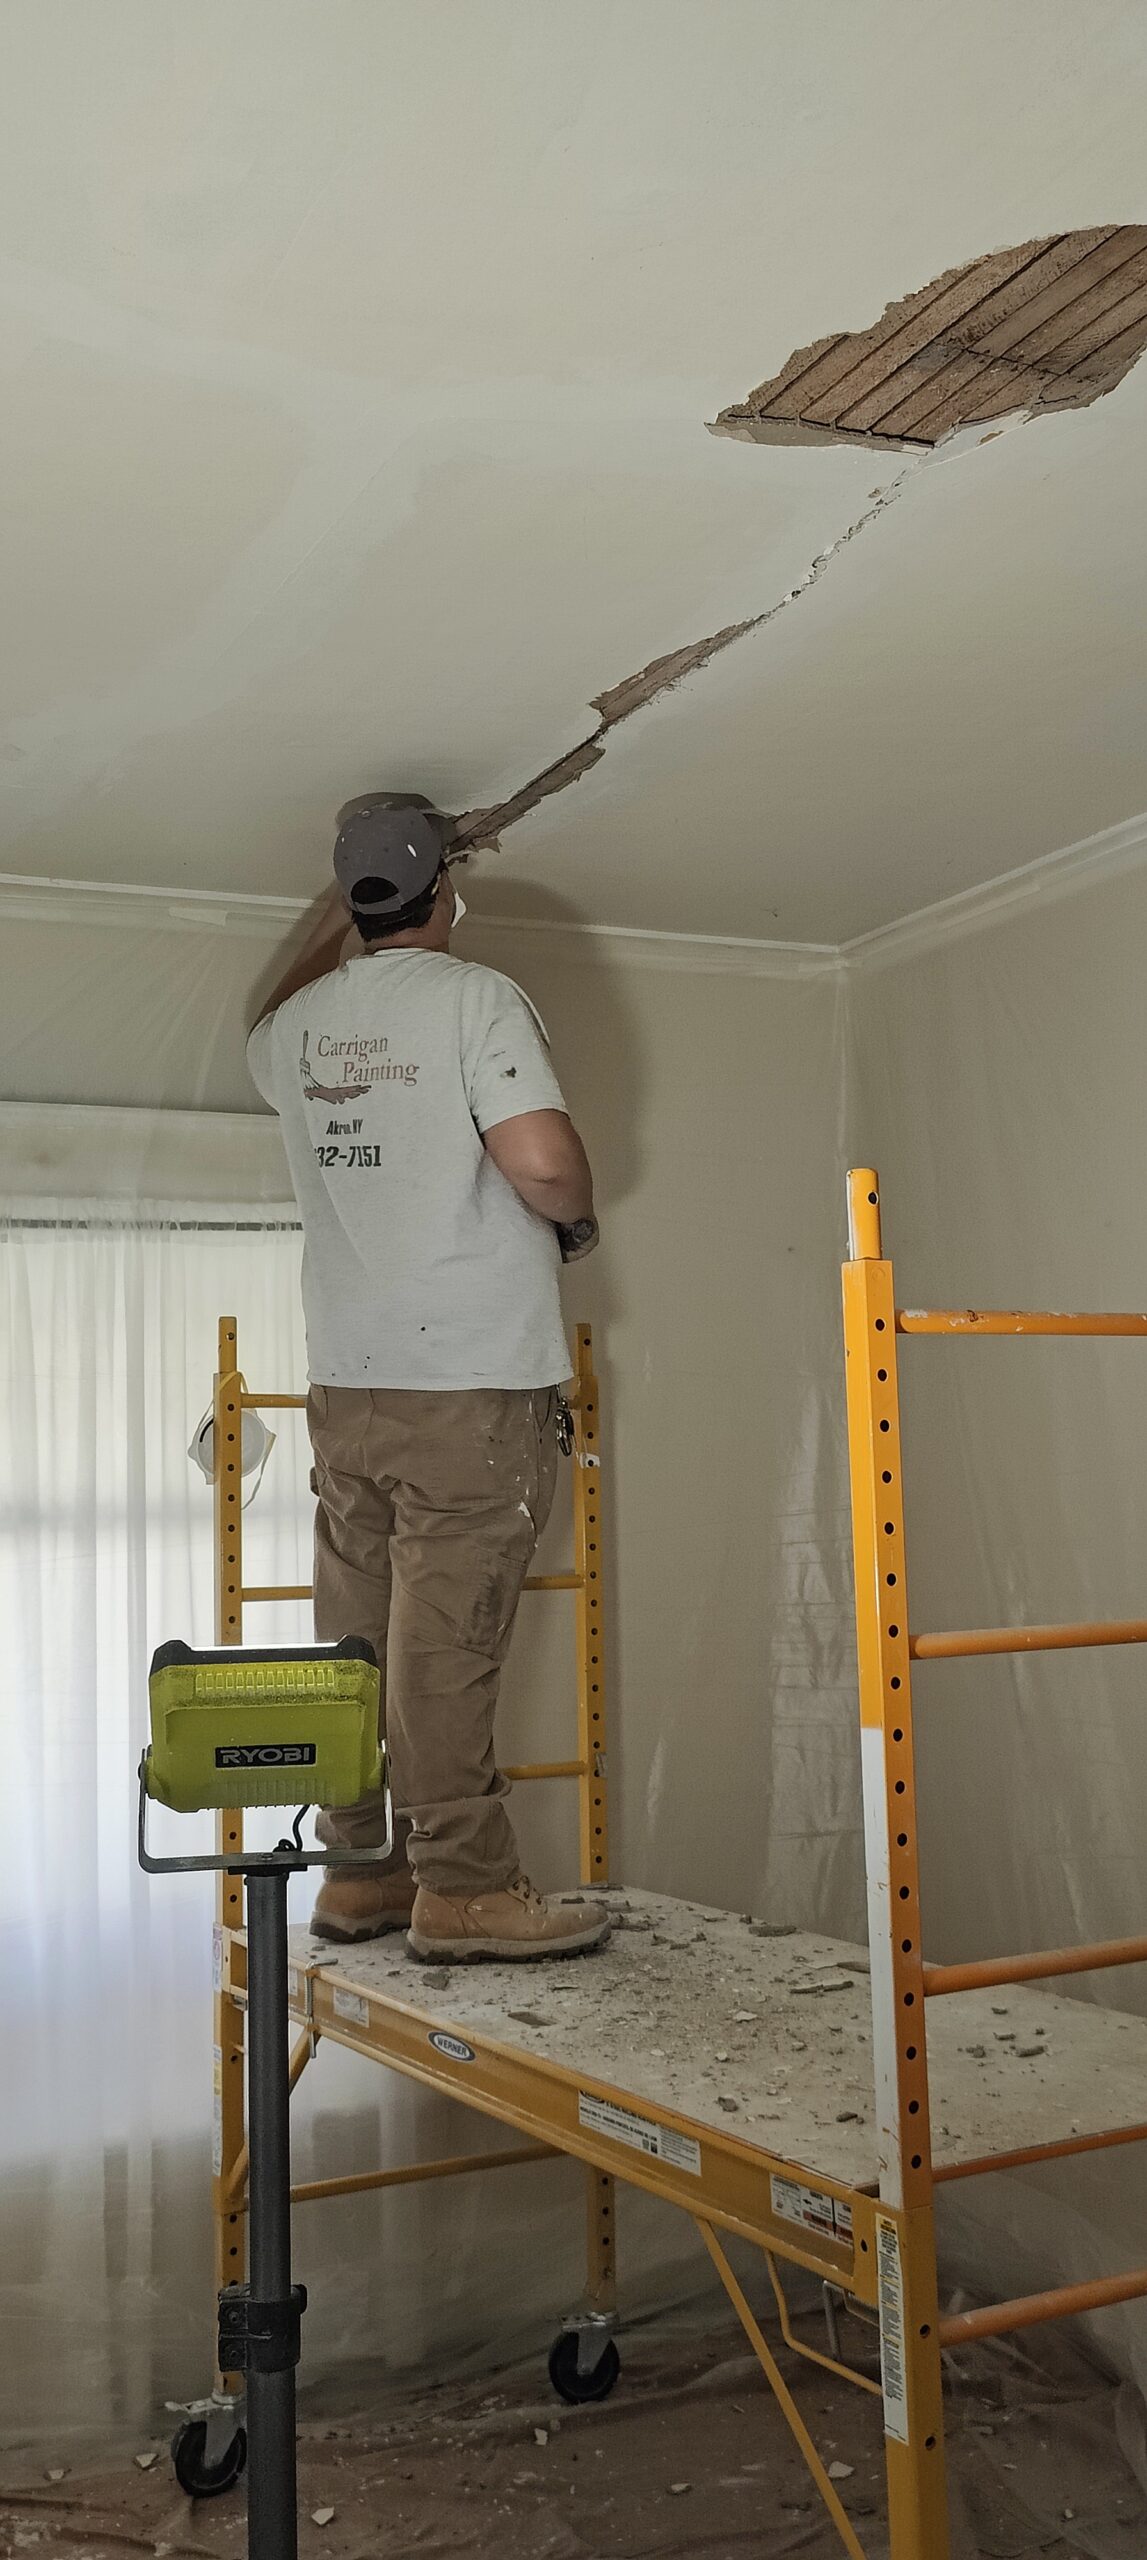
We are back to this beautiful home in Williamsville to finish a large plaster restoration project we started about a month ago. We were called after the remediation was done. The homeowner has lived in this home for over 60 years and was adamant about it being repaired with plaster. We have documented this project in detail from start to finish.

What we started with was a 7′ x 7′ hole in a rocklath plaster house down to the studs in the wall, and a 3′ x 7′ hole in the ceiling. We installed new insulation, then, blueboard (The industry standard replacement for rocklath), then gypsum plaster basecoat, then finished the wall and ceiling with lime putty and Plaster of Paris mixed on site and applied. Plaster is troweled smooth. This can cause stiff rollers to slide across the surface of a plaster patch instead of rolling.
When we left versus today:


This was a full thickness plaster restoration including new blueboard, plaster basecoat, and lime and Plaster of Paris finish coat. This has been drying for 29 days. New plaster typically requires 30 days of dry time in order to safely paint with waterborne paints. However, we prefer to play it safe and always prime new plaster.
The patch looked really good with some minor imperfections near the radiator at the bottom and the left side. But over all looked great.
Red Label vs Blue Label

We use Sherwin Williams ProBlock HS oil primer(Blue Label) as our go to fresh plaster primer. Its guaranteed to work. We have been using it regularly for over 10 years. So we are naturally a bit skeptical when we saw the new red label on our beloved ProBlock – Uh oh what did Sherwin change now? The store said nothing changed – We have heard that story before.. So today we used it for the first time.
First Impressions
Looks like ProBlock, smells less, rolls out nice with no overspray. We rolled this wall with a mini roller because I didn’t want to ruin a big roller.. So my over spray results – may be limited, but Blue label, drips and sprays a lot, after all it is solvent based. I had zero white spots on me when I was done rolling all of that. We call that a win.
It did seem (to me) that Red Label took a little longer to dry than the old stuff. Also, while the smell was there, it was nothing like previous uses. Of course we did have all the windows open, but still, old ProBlock smells a lot.
Something I noticed in the middle of the patch was an area that looked wierd after priming. Almost like alligator paint under a window, but not quite (of course why would I take a picture?). While waiting for the primer to dry, we cut and rolled the ceiling. After about 60-90 minutes of the primer drying, we did our touchups with mud, once that was dry – another 60 minutes, sanded, spot primed, and then rolled the wall with ceiling paint.
The area that looked weird PEALED OFF. Yikes!
We picked at it and it seamed to not be pealing any further. We re-primed the area again with Red Label, which seemed to lift the edges a little bit what was a little concerning.


We primed the spot that pealed again with Red Label, we decided to let it dry over night. Tomorrow, I will have more Blue Label on the truck, just in case, but we have a finite supply of Blue Label ProBlock.
This is just one small spot on an otherwise very large plaster restoration project. Could be a couple of reasons it pealed, that have nothing to do with the quality of the new primer from Sherwin Williams. Further experimentation will be done with it though, to see if it is something we can continue to use or if we will need to replace it with something else.

More to Come!