This week we are working on a ceiling in a ranch home in Lancaster NY, where the living room, dining room, kitchen, and hall all comes together. This looks great on paper, but often leads to ceiling cracks. This area had been repaired multiple times over the years, to such a degree that eventually someone sprayed popcorn ceiling texture in an attempt to hide the damage. There is also a definitive bump, like 2 small speed bumps on the ceiling from previous repairs we attempted to mitigate as well.
However whoever repaired the cracks before us, didn’t do the repair properly which didn’t help the situation. Curiously, the drywall itself broke, and wasn’t secured to the framing, which just made the situation worse.
Ceiling Cracks


After setting up our dust containment boxes, we dug into the damage. We discovered that whoever attempted this repair prior to us, clearly does not know how to use mesh tape! Its surprising how many contractors out there do not know how to use mesh tape, they think by merely mudding over the tape, that it will somehow magically embed itself with in the mud. Instead, the mud goes through the little holes and that’s that. It will not magically connect on the backside of the tape!
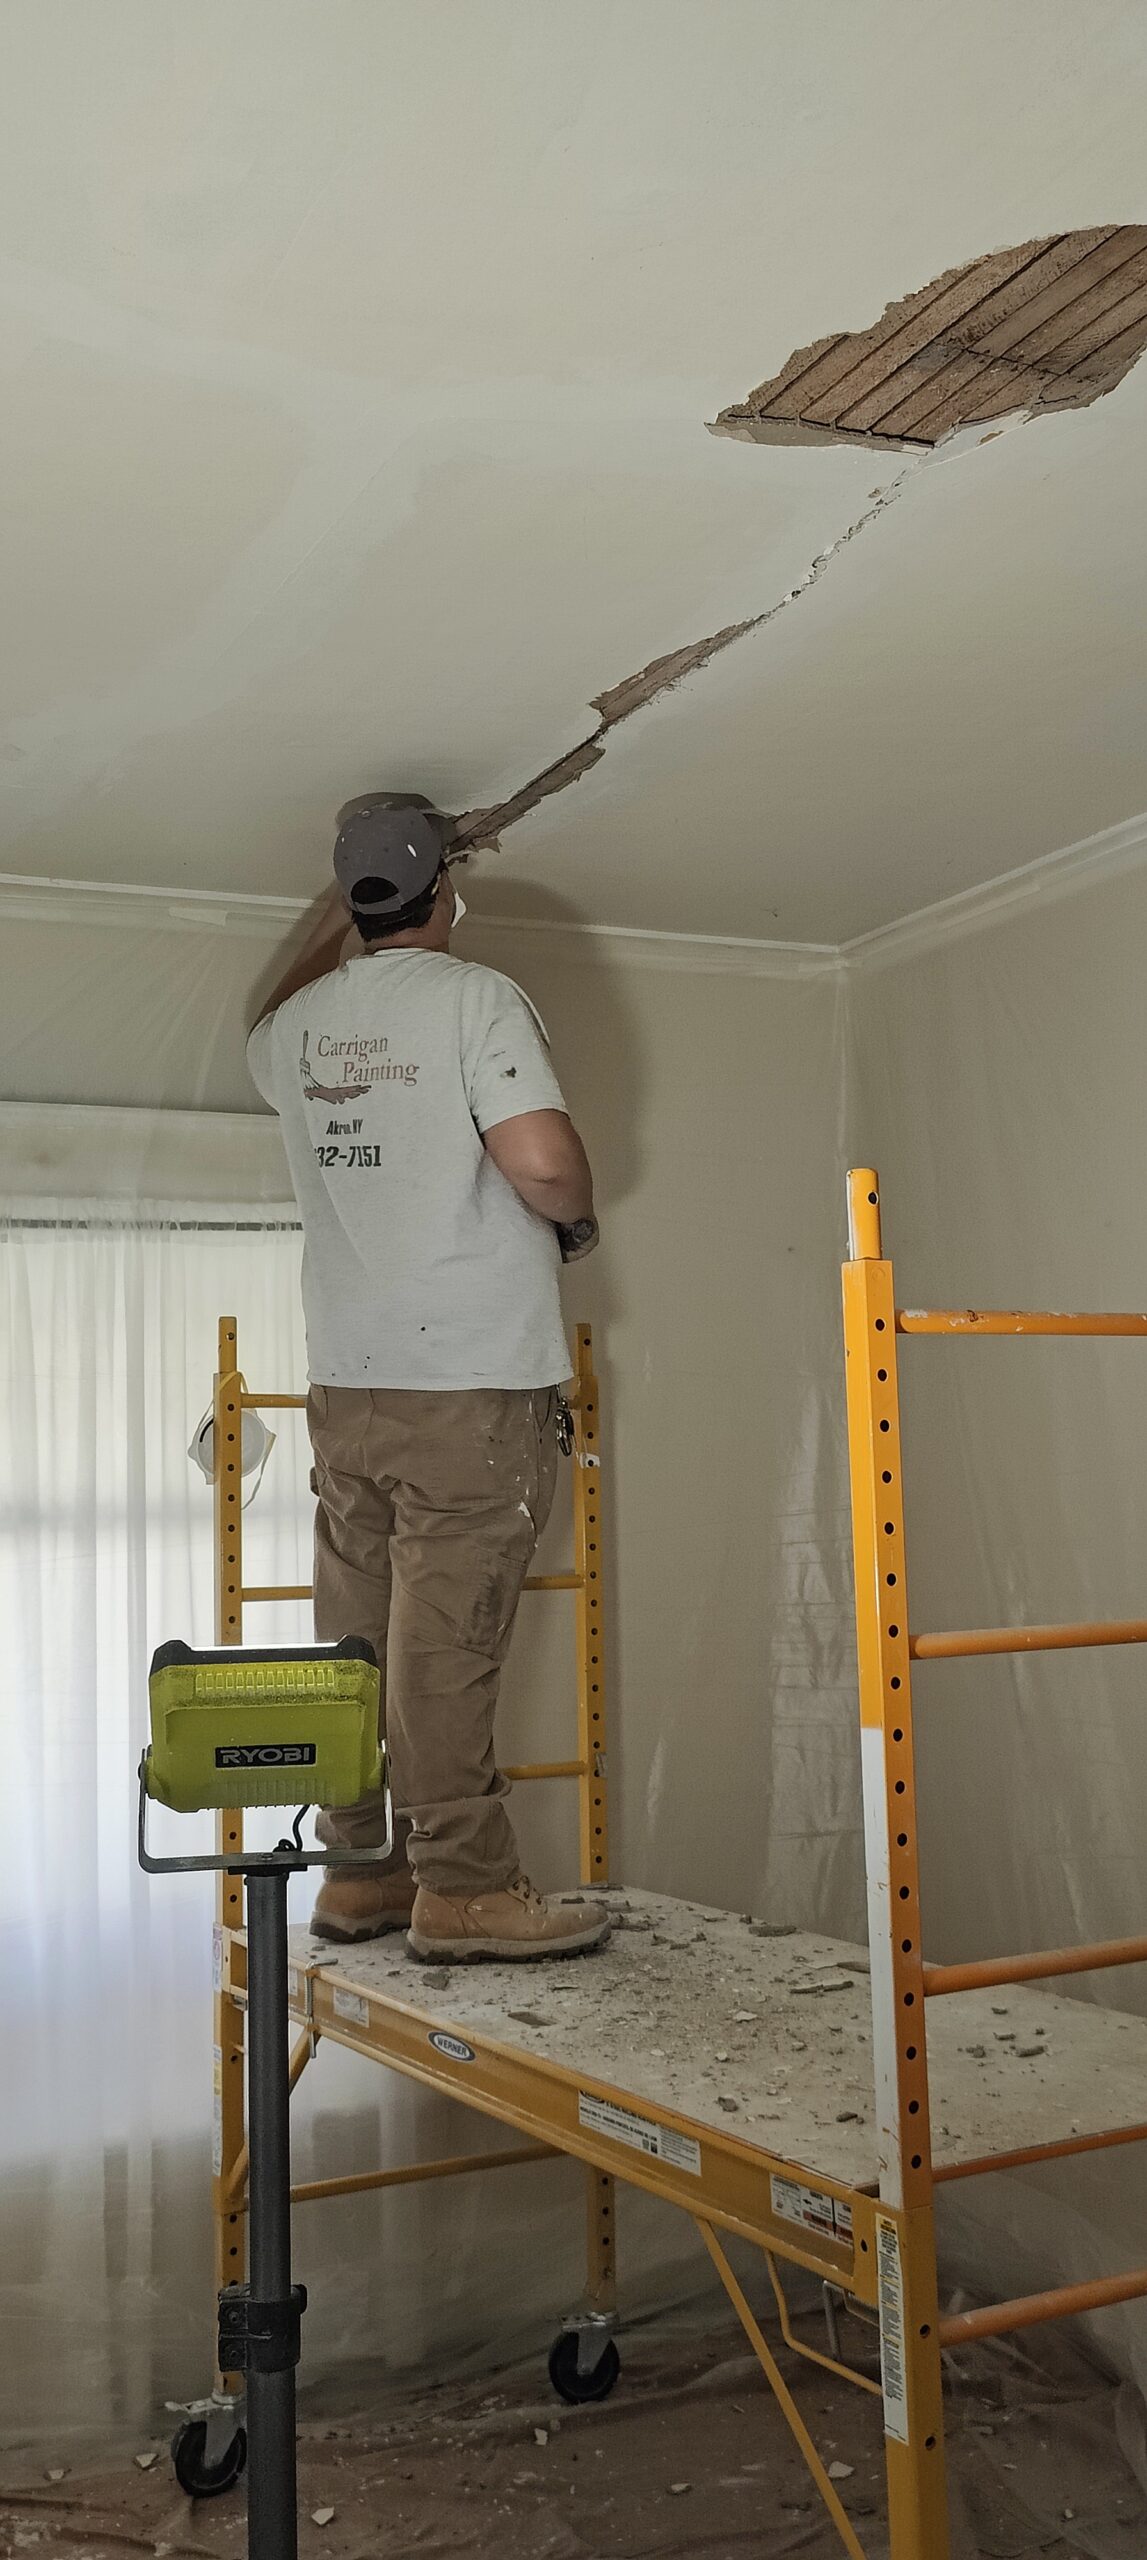
In the following two photos, there is no mud under the tape, how is this supposed to reinforce the crack? Further they did’nt even open the crack, they just mudded over it. Such shoddy work!


Crack Repair
Below is how to properly repair ceiling cracks:


Cracks in walls and ceilings, must be opened up like this in order to remove the loose broken material, and to give the new material something to grab on too, otherwise, it will just re-crack. The downside to doing it the right way, is that it takes longer.
We also secured the ceiling drywall to the ceiling joists along the crack, since it was not attached to anything, you could lightly push on it and make it move. Yikes!
We applied USG Durabond, keeping it tight to the crack, then we laid fiberglass mesh tape into the wet mud, then skimmed over the tape to firmly embed it properly into the mud. If this ceiling cracks after this, it can not be fixed.


We applied 1 more tight coat of mud over this after the material had set up, once the joint compound was dry, we sanded and spot primed the repairs. and then sprayed popcorn texture over the repairs and surrounding area, since the original popcorn texture looked splotchy. The multiple shades is due to the rest of the ceiling being freshly painted by us earlier in the day.


The new texture is a little more rough than the existing, since the existing texture has at least 3 possibly 4 coats of paint on it prior to us painting it. Tomorrow we will spot prime where we sprayed texture, then paint this area with ceiling paint, and then paint the entire ceiling a second time to ensure uniform color, sheen and (better) texture matching..
Repairing Our Patchwork
So, today we arrived to cut and roll the entire ceiling (which we did), including the area we patched and sprayed yesterday. After the ceiling was painted, we determined we didn’t like the way the smaller of the two repaired cracks looked. Like a little speed bump on the ceiling. We couldn’t leave it that way, so we decided to scrape off the popcorn texture we applied yesterday, and try to make the smaller of the two repairs, more flat. Now we are working on top of a little mound of mud from previous repairs so we have to smooth this mound out a little bit, so it would appear more flat.


Its important to fill in what is ‘low’ and shave down what is ‘high’. This is why we put mud in two strips. The center is high, but cant be shaved down, more than it is. We used a palm sander, to cut it down, an orbital sander would dig into it and be counter productive. Then hand sanded it to better shape it, prior to adding more material.
Then we sprayed more texture. Tomorrow, we will return to prime and paint this area to complete this project.


Ceiling Repaired and Painted


⭐️⭐️⭐️⭐️⭐️ Google Review – October 8, 2025.
“The work they did on my home in Lancaster, to repair my popcorn ceiling that had a giant hole and a large unsightly crack running down the hallway, made it look as if there was never a problem. I would highly recommend giving Carrigan Painting serious consideration for any drywall repair, ceiling repair or painting needs. Look them up if you are in Lancaster!”
— J D. (Lancaster, NY)