Today we started a garage project involving drywall repair and painting in Spaulding Green, Clarence NY. We are correcting a failed ceiling repair caused by a water leak from the master bathroom shower drain above. Given that it is in the garage, and the size and height of the ceiling, I am kind of surprised an access panel wasn’t suggested instead of a drywall patch. Life happens, and replacing a panel after the repairs are completed is cheaper than patching and painting the ceiling.
In addition to repairing the ceiling, this project includes finishing the drywall, priming the garage, and painting both the ceiling and walls. This post documents our process from start to finish.
Set-up


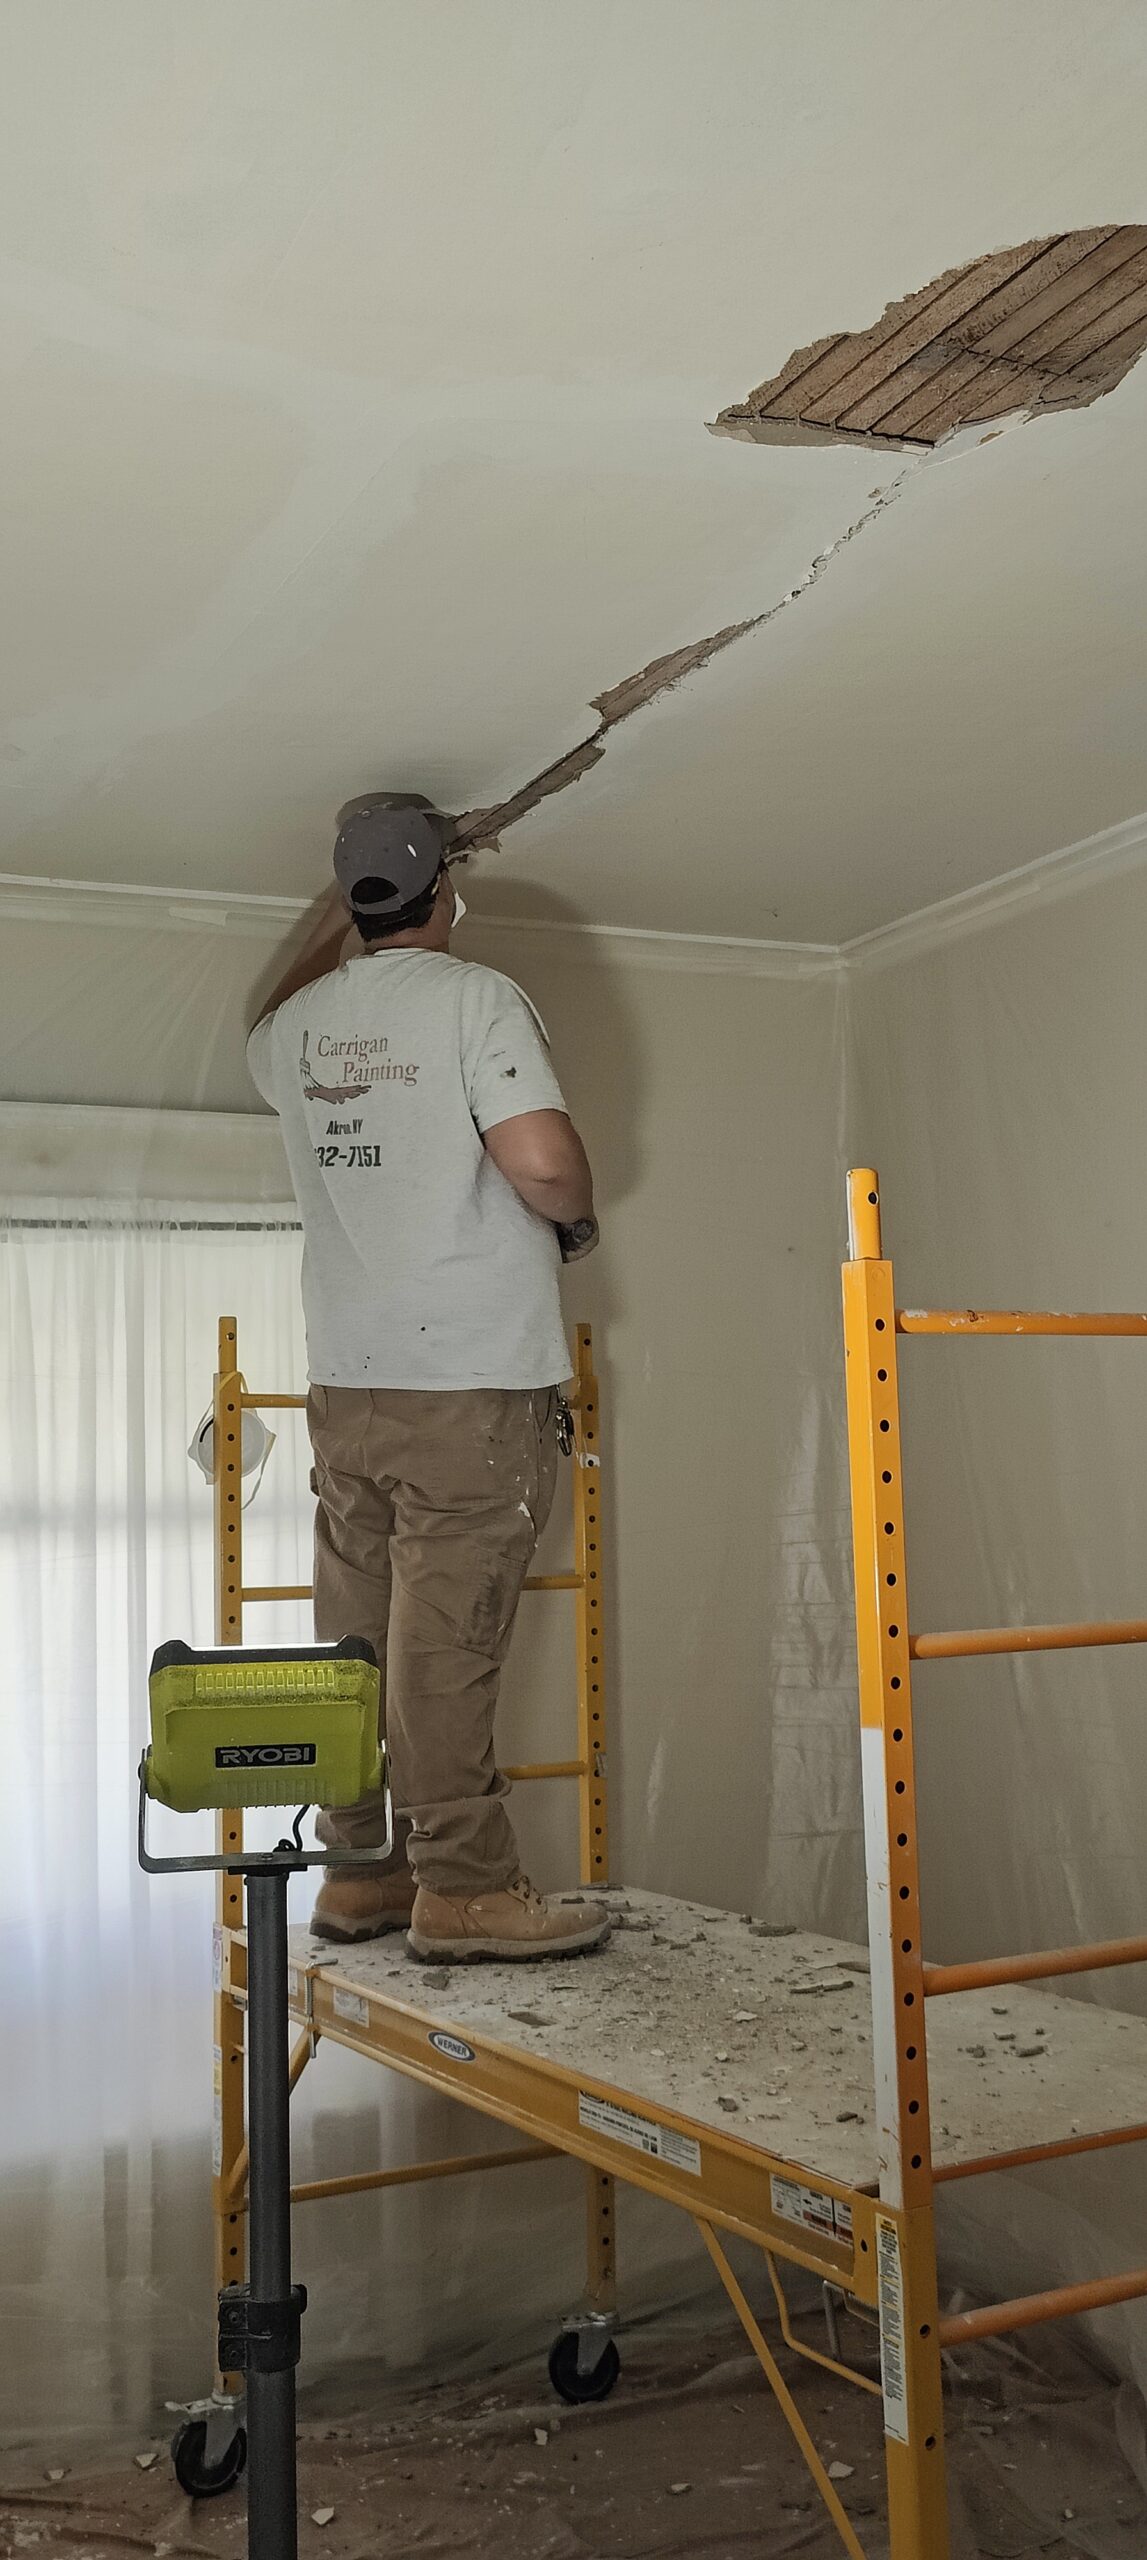
After protecting the floor with drop cloths, we addressed the existing ceiling patch. Using a straightedge (a 4-foot aluminum darby we typically use as a screed for large plaster repairs), we checked the patch for flatness relative to the surrounding ceiling.
Ceiling Repair


This immediately showed us how much material would be needed to bring the patch level with the rest of the surface. It also revealed an odd high spot along one edge of the repair. The ceiling joist does not appear to be sagging, so the cause is unknown. Our approach will be to feather the area out to reduce visibility once finished. Photos of this step were missed.
With the patch addressed, we moved on to the rest of the garage, addressing seams, butt joints, and corners throughout. Several corners were uneven and required proper finishing to bring them up to standard.


Priming Walls & Ceilings
Today, we sanded the garage, and primed the walls and ceilings. We have already noticed some imperfections and a couple of areas we don’t like and will be addressing tomorrow.


At the end of the day, we clean up a bit, so the home owner can charge their car and not track dirt from the garage into the house.

Tomorrow we are applying color to the walls, and fixing the areas we don’t like.
Painting Walls & More Patching
In the morning the walls and ceilings looked ok. However we decided to begin running color on the walls, as we knew there would be a bit of work ahead of us. The color really made the imperfections stand out under critical lighting, so over lunch we stopped at Home Depot and picked up more mud. After lunch, we spent the afternoon going over the walls and ceilings with a high powered work light. We need this garage to look good when we are done.


Always Prime Patches
After patching everything we didn’t like, then sanding, we primed all of our patches with Behr 436, a general purpose acrylic primer. It is similar to waterborne kilz. Next is painting the ceiling and walls, and then clean up!


More Painting – Finished
This garage is bigger than it looks. It took use 2 days to do two coats on the ceilings and walls, and then clean up. Getting the drywall dust off the little concrete ledge along the walls proved more difficult than anticipated, so in the future we will be taping the edges. The dust seems to have gone hard and pasty, it was weird. Might be due to the cold, average temp in that garage for the last week has been 60.
We swept the floor, vacuumed, and then went over the floor 3x with a swiffer. It really needs a rinse with a hose, but oddly there is no water spigot in the garage. The homeowner plans to add one.


Below are some Before and after pictures.