Deerhurst Park, Kenmore NY— The rocklath plaster ceiling in these homeowners’ living room collapsed on 1/9/26. Thankfully no one was in the room at the time of the ceiling collapse. Prior to the collapse large cracks appeared running down the center of the ceiling. 6 days later the ceiling dropped. The homeowner who was home at the time, described it like a bomb going off in the house. They thought the whole house was coming down. What a scary situation for sure.
The following 3 photos were taken by the homeowner prior to the ceiling collapsing.
When a plaster ceiling bulge reaches this stage, collapse is no longer a possibility; it is imminent. There is nothing holding the ceiling up in a structural sense. Gravity has already won. In this case, the bulge measured approximately 16 feet long by 9 feet wide. Because of its size and gradual development-over decades, it is easy for those without plaster specific experience to miss.
5 days prior to collapse:


If any ceilings in your home suddenly develop cracks like this, especially if it is a plaster ceiling, immediately remove all personal items from the room, and do not allow anyone in the room.
Then call/text (716-697-3560) and email us or a ceiling repair contractor in your area. If the ceiling does collapse, its a good idea to have the home checked for structural integrity by the fire department. These plaster ceilings can weigh over 4,000 pounds! An 8 foot drop to the floor equates to a 2 ton mass travelling at about 15mph coming to a stop on your furniture and floor!
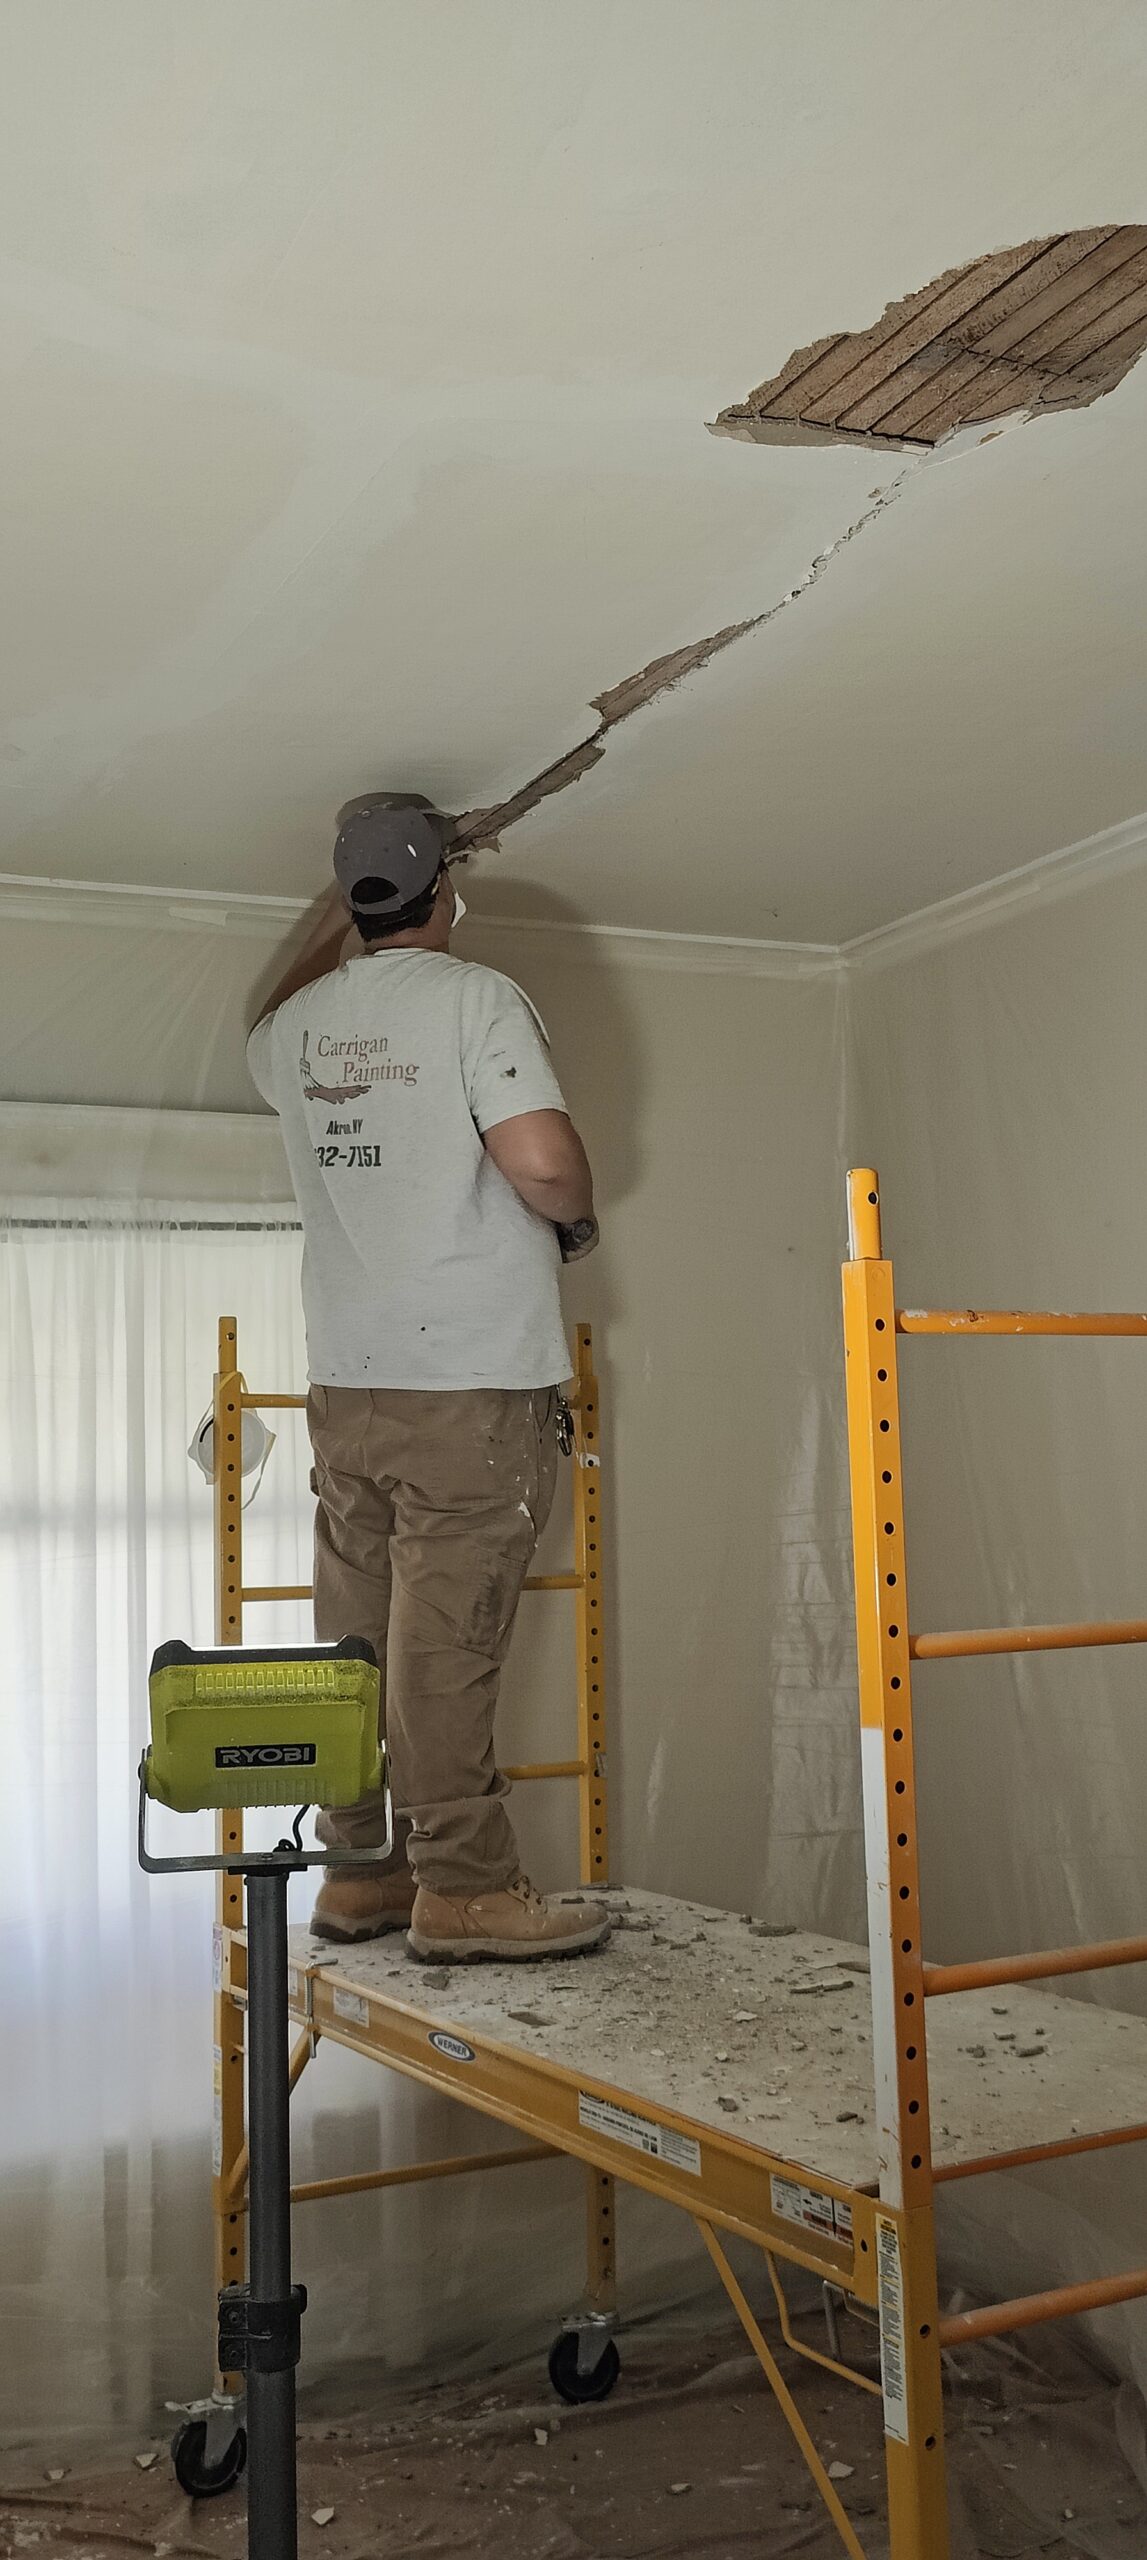
The Day of Collapse

This photograph was taken by the homeowner approximately three to four hours before the ceiling collapse. At this point, the collapse was already underway.
A section of the rocklath plaster ceiling had separated from the surrounding ceiling structure and was hanging solely due to the rigidity of the surrounding, already-failed plaster. A visible void above the hanging section confirms that the ceiling was no longer structurally supported.
Seeing this situation in person would immediately shift the response from removal to limiting damage, containing dust and debris, and keeping people out of the room. The window for controlled, safe removal of the ceiling had already passed.
Situations like this are schedule interrupters because they are safety issues, not routine repairs. It is also not uncommon for electrical wiring to be attached to ceilings, or even embedded, which introduces a serious fire and life-safety risk during a collapse.
This mirrors a previous ceiling failure we were called in on after two drywall contractors had recommended simply drywalling over an actively failing plaster ceiling in Amherst.
Post Collapse
The damage from the ceiling, is substantial. Their hardwood floor suffered gouges and scratches, It ripped door knobs off the french doors and put deep gouges in the wood. It also destroyed some furniture, and the TV, among other items.


Because we couldn’t start the restoration process for 5 days, we set up a baker scaffold under the one side of the plaster ceiling that is hanging off the ceiling joists. We cleaned up the debris on the floor, laid down rubber backed drop cloths, then brought in OSB plywood to lay across the fireplace, the windows, and the floor under the scaffold. Initially I was thinking of removing what was hanging myself, however after further inspection, I chose to wait until we have people on site, and the room properly set up for this type of removal, as it is very messy, dirty, and extremely heavy.


In 16 years of repairing ceilings around Western New York, we have never seen tar paper above a ceiling. We reached out to Buffalo Plastering to find out if there is something may be I am missing. They had never heard of such a situation either.
Upon further research, it seems that in the late 1930’s and early 1940’s, they put tar paper above ceilings in some situations as a moisture barrier. Basically trying to solve a hypothetical problem while potentially creating an ugly situation – mold. Trapped moisture in a ceiling is bad news. We will not be installing a replacement moisture barrier above the new ceiling, as the space above is heated.


The opposite side of the room of the baker scaffold is a rather large drywall patch in the ceiling. This patch is held in place with screws and is in no danger of collapse. The rocklath ceiling, was held up by 1 1/4″ nails. The nails pulled out of the wood ceiling joists. The rigidity of the plaster itself, held it in place until the crack appeared. After that it was a matter of time before the ceiling hit the floor, and it did.


After cleaning up the debris from the ceiling collapse, we laid down ramboard and OSB, and then began removing what was left of the ceiling…Nin, and his son Micah from Bogue Art Studios came in to assist us with the removal of the old plaster ceiling and installation of the new drywall ceiling. It is always a good time working with them.


We meant to get video of removing the remaining hanging plaster, but the moment we touched it, it dropped. That is the 3 panel piece pictured below, weighs about 60 pounds.
Removing ceilings often reveals some of the history of the ceiling. In this case this ceiling had multiple patches, some fairly recent within the last 20 years, and some dating back decades.
The picture on the left(below) is an old drywall patch in a plaster ceiling, you can see the layers they had to create in order to get the patch level with the existing ceiling… 3 layers, spanning over 2″. Lots of mesh tape. From top to bottom: rocklath, drywall, drywall compound, mesh, more compound.
The second one, is an old plaster patch someone put in, I am assuming this patch is at least 50 years old due to its location. But thats what a plaster patch in a rocklath ceiling looks like from the back side. In this case, it appears theres a piece of metal lath, and then they finished it with plaster basecoat and lime and Paris. These two patches show the difference between those who ‘patch plaster with drywall’ and those who are plasterers.


This actually reinforces my theory that there was a massive plaster bulge on the ceiling and it had been there for well over a decade. Whoever patched the ceiling with drywall (at least 15 years prior) had to lower their patch about 1″ to match the existing ceiling. Which means the plaster ceiling wasn’t attached to any thing where the drywall and plaster met.
We did an emergency ceiling replacement in August of 2025, where the majority of the ceiling spanning the living room and dining room was on the verge of collapse. The dining room ceiling was hanging 6″ below the ceiling joists and was held up by the light fixture in the center of the room.


The image below is a good example of what a rocklath plaster ceiling looks from the backside. This piece is one piece, that came off the ceiling today, and stayed in one piece showing the strength of this wall and ceiling system. Very strong. extremely heavy. On the other side of this is 1/2″ of plaster basecoat, and a lime finish plaster. The rocklath is nailed to the joists, staggered for strength, then coated with plaster.

This failed because the nails holding it up were only about an inch long. Had the nails been longer, the ceiling probably wouldn’t have collapsed. We have been informed by the homeowner that they are not the first home in this neighborhood (Deerhurst Park in Kenmore NY) to have these types of ceiling problems.
This ceiling has shown us things none of us have seen before- live and learn. So we have these super heavy duty metal brackets, that appear to be installed upside down. They look like really heavy duty homemade joist hangers. There is 6 total, 3 on each end of the room. We cant figure out what they’re for. But they’re going to be in the way of the new drywall ceiling!

So instead of getting creative with the drywall, we are installing furring strips, which will lower the ceiling by 1/2″. The ceiling is actually higher now, as it is tight against the ceiling joists, where as the plaster ceiling was not attached to the ceiling joists and had dropped at least 2 inches or more prior to collapse.
After removing the edges of the ceiling, we picked up drywall, brought it back and tomorrow will begin hanging it and finishing the new drywall ceiling.

Day 2:
Installing The New Ceiling
Today we began installing the furring strips for the drywall. Using a framing nailer and 2 3/4″ nails, make quick work of installing the strips. We decided to go with with 2″ wide strips over 1″ to make our lives easier, as well as give the drywall adhesive more surface area. We glued the drywall to the ceiling, and used around 25-30 screws per sheet. That ceiling should outlast the house.


Its a good idea to take detailed pictures of ceilings or walls while they’re open like this. If anything starts to leak later, there wont be much guessing as to just where are the water lines?


Hanging new board.


Tomorrow we begin finishing the drywall
Day 3 & 4
We taped the seams and the corners with Durabond and EasySand 45, and then finished it off with USG Dust Control.


We also chipped out a couple of cracks we discovered in the walls:


We came across some autographs on the walls where the paint chipped off


Day 5:
After sanding the new drywall ceiling and corners, we primed the ceiling using Sherwin Williams PVA Drywall Primer:

Then we went back over the ceiling, and fixed everything we don’t like:

Day 6-9: We had weather related delays…


All finished. We did three coats of paint on the ceiling, and two coats of paint on the walls.


The plaster ceiling in this room came in at 2,800 pounds. Full removal and disposal of the failed plaster ceiling, and installed a new drywall ceiling and painted the room, leaving these homeowners with a move in ready space. If you have a situation like this in your home, and you live in the suburbs of Buffalo, give us a call, or send us a text: 716-697-3560