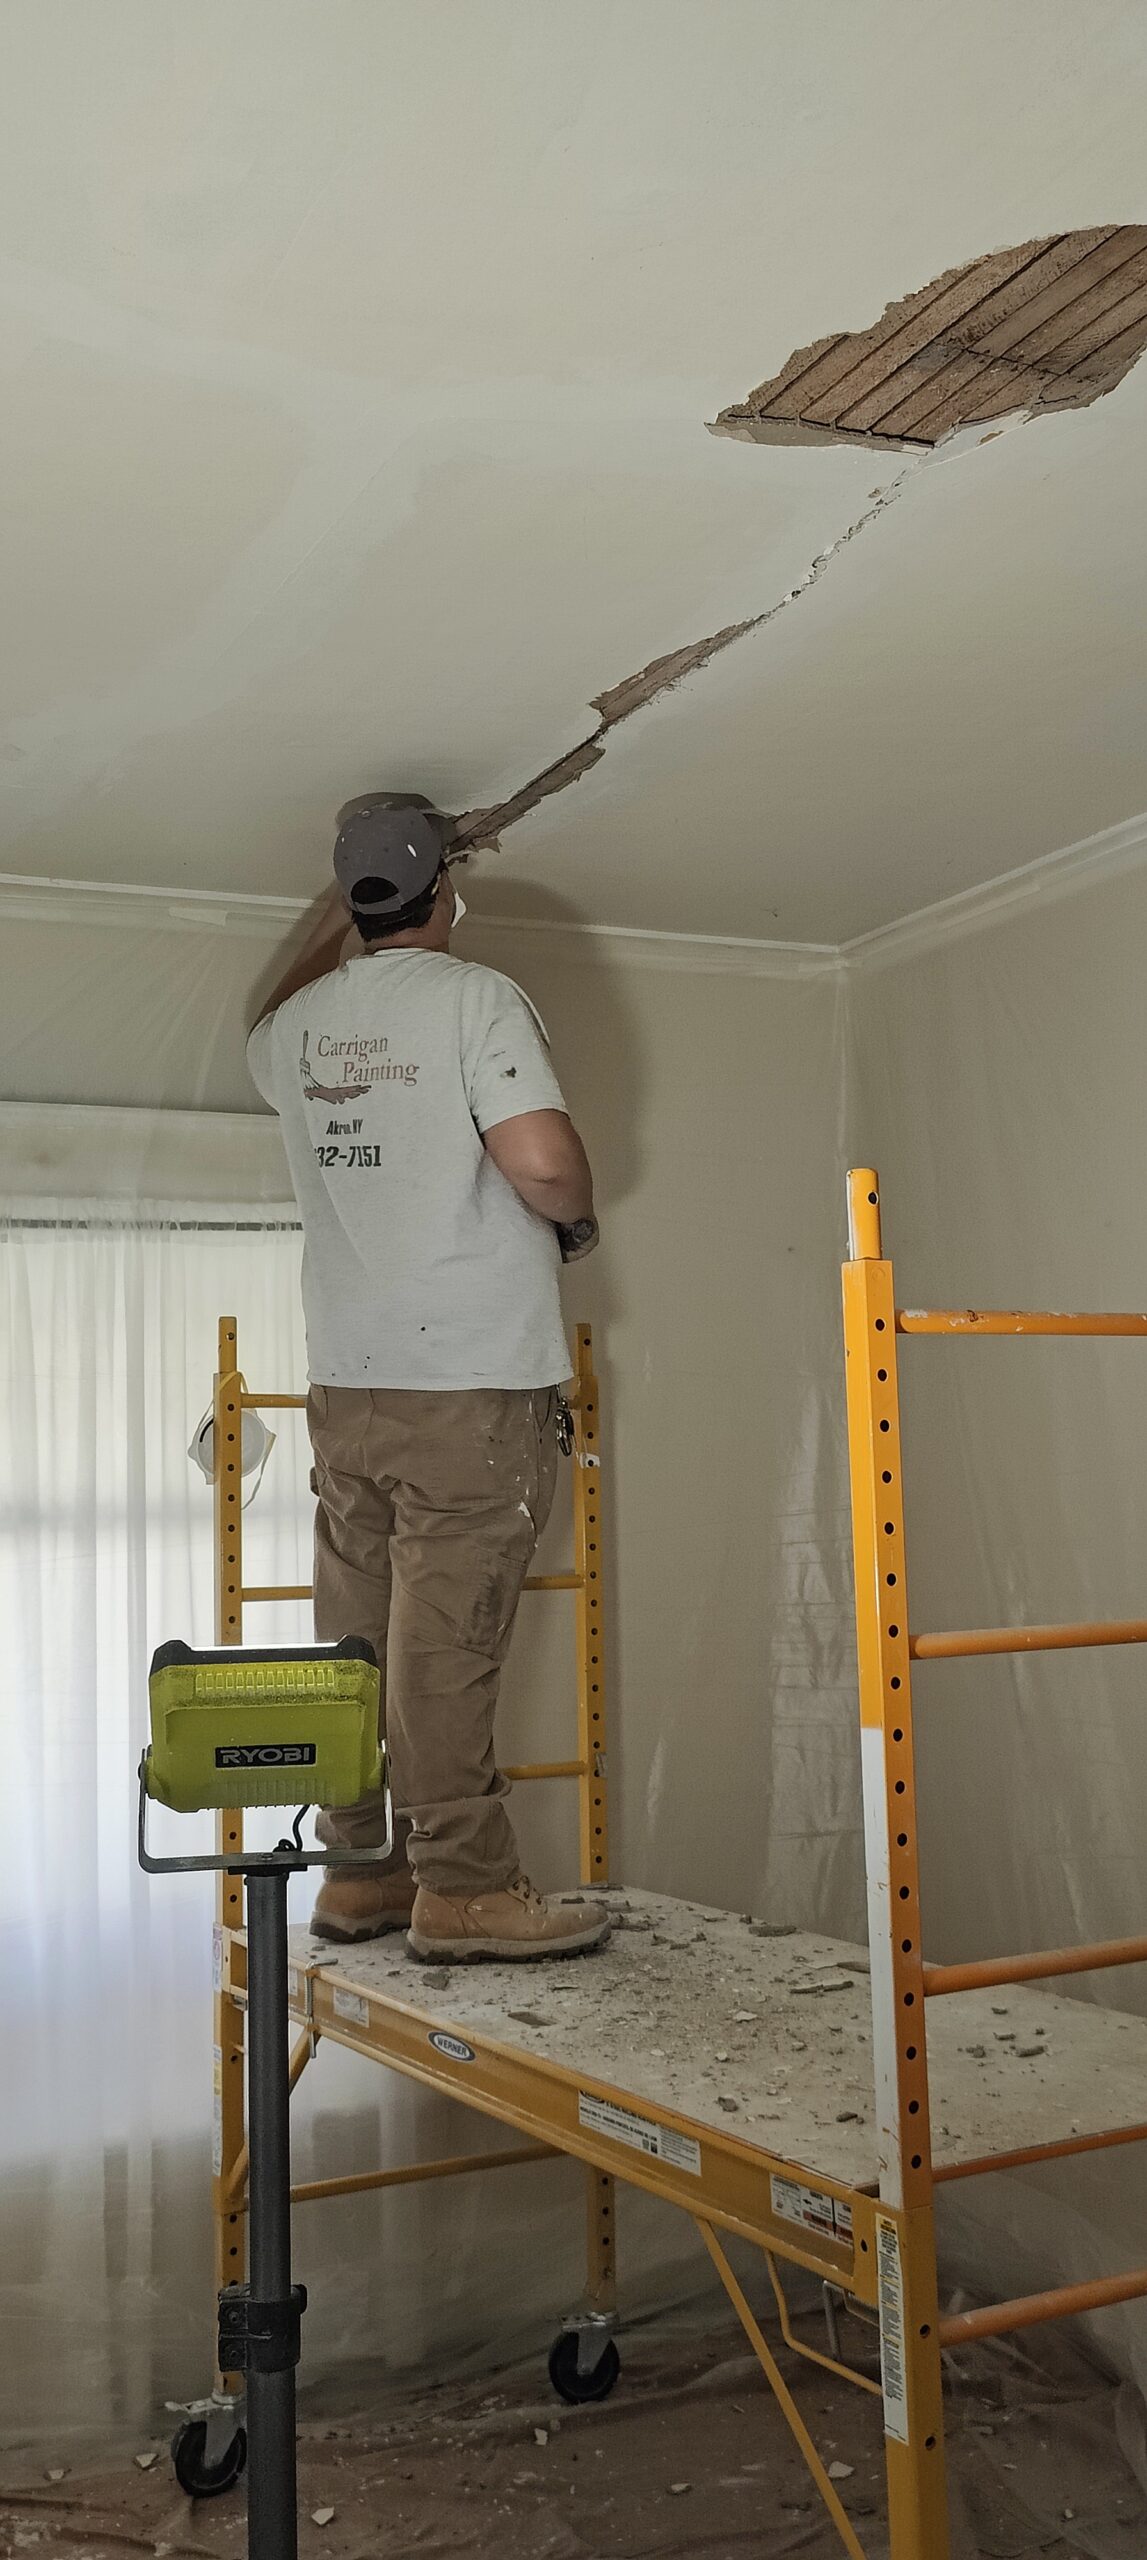
This plaster ceiling repair is the result of a roof leak. The homeowners had the roof fixed, then called us to repair the plaster ceiling with plaster, and not drywall. They were pretty adamant about fixing this with plaster. No problem*. After removing the damaged plaster, we installed Imperial board, applied plaster base coat to the joints, and then finished off the patch with plaster finish coat. And then things went sideways!


We removed most of this with a hatchet:

After the damaged plaster was removed, we installed Imperial Board, and filled in the edges. Imperial board is different from drywall in that it has a special paper on it which allows plaster to stick to it. Its our only option in homes built with Rocklath. You can not buy this at big box stores, and its special order from the supply yards.

After checking the patch with a darby, and determining that the gap between the board and the ceiling to be under 3/8″, we decided to just finish the patch instead of trying to lay out a thin coat of basecoat, which we have had mixed results with in the past.
Then the problems began.. in the end, I scraped off the soft finish coat, which refused to set after 3+ hours (no idea what went wrong here) but tomorrow we are finishing it with lime and plaster of paris, and skipping diamond coat. That stuff has been very annoying lately, as it takes longer and longer for the finish-coat to set- often over 60 minutes, delaying the progress of jobs quite significantly. We need the finish to set, so we can finish the patch. If it doesn’t set, we can’t finish it.
After waiting around for 3 hours for this plaster to set, I decided instead to scrape it off, and we will try again tomorrow with traditional plastering technique. That is where we mix up the lime and set our own gauging with paris. I haven’t done that in about 5 years as Diamondcoat is typically ready to go in in 45 minutes, but as of late it has turned into a real problem for patchwork. Back to the tried and true method!

Diamond coat has the lime and paris pre-porportioned in one bag. Its plaster finish, but instead of carrying extremely heavy premixed buckets of lime, and powder, we just need 1 bucket of powder. The benefits of diamoncoat is attractive for many due to less material handling, as the lime and paris is in the bag, just add water. However using this method, means your waiting on the gauging of the standard mix which is fine if your doing entire ceilings and walls at a time – not so much for patchwork!
Where as with the traditional method, we mix buckets of lime in our shop, and then mix the lime with the paris on site. The benefit here is we can set the set time through gauging. The paris makes it set, the lime gives you workability. But lime is also caustic and can cause chemical burns so care must be taken.
Below is an example of what I am talking about. The outer ring is lime. You put water in the middle, then sprinkle in paris. Then mix it up by hand using a hawk and trowel. The big benefit here is the ability to make it set faster.

Update: 10/31/25:
After the disaster last night with DiamondCoat, we are back with Lime and Plaster of Paris.


I forgot how nice lime and paris is to work with. DiamondCoat is nice cause it has both in the same bag, but mixing it up by hand, was a bit more work, but produced the results we needed. Unfortunately, we can’t get Paris in 50lb bags anymore. A common thread in WNY these day – the ability to get plaster, is becoming more and more difficult.


Now this needs to dry. We will be back in a couple of weeks to paint the ceiling and walls.
Update 12/16/25:
We are back to finish what we started. back in November. The bathroom ceiling has a paint texture to it being that is has been painted a bunch of times over the last 60 years, and our plaster patch is perfectly smooth. This texture mismatch will show if we just paint it. So we skim coated the entire ceiling, so the texture is the same across the surface.

Next we began repairing a small hole in the kitchen, which is the result of a pipe that was removed.

More to come!
Part 2: Ugly Plaster Ceiling Repair and Painting in North Tonawanda NY – Part 2 of 2