Amherst, NY:— What began as a ceiling repair, turned into a ceiling replacement in Snyder NY. Plaster bulges that are showing worsening cracks, crumbling, and large deflections like seen in the photos below is an evolving situation that requires immediate attention to minimize damage to both the structure and your belongings. The pillowing effect is most often seen on rocklath plaster ceilings, and sometimes on drywall ceilings. We recently did a job in Cheektowaga that had a pillowed drywall ceiling. The pillowing on plaster ceilings is (from what I am told) caused by not allowing the plaster basecoat adequate time to dry, prior to applying the plaster finish coat which warps the rocklath panels. Then, gravity takes over after 80 years and you some times end up with this expensive situation.


The large plaster bulge that is 3′ wide by 16′ long is no longer attached to the ceiling. The reason it hasn’t fallen off the ceiling is due to the rigidity of the plaster itself. But make no mistake, if this were to drop, any furniture under it would be seriously damaged, if not destroyed. One piece 18″ wide x 2′ long weighs in at around 20-30lbs with nails sticking out of it.


We come across these types of ceilings on occasion, and while I try hard not to scare people, it is important for homeowners to understand that if the ceiling collapses prior to us getting there, it will destroy what ever is under it. In this case, the homeowners removed everything from the room.
The homeowners were going out of town for 2 weeks so we couldn’t start right away, so I protected the floor with what I had on the truck.

Today we laid down RamBoard over the hardwood floor, and baseboards, then laid down OSB sheeting over the ram board to protect the floor from falling plaster, which is very heavy and can easily damage any interior floor.
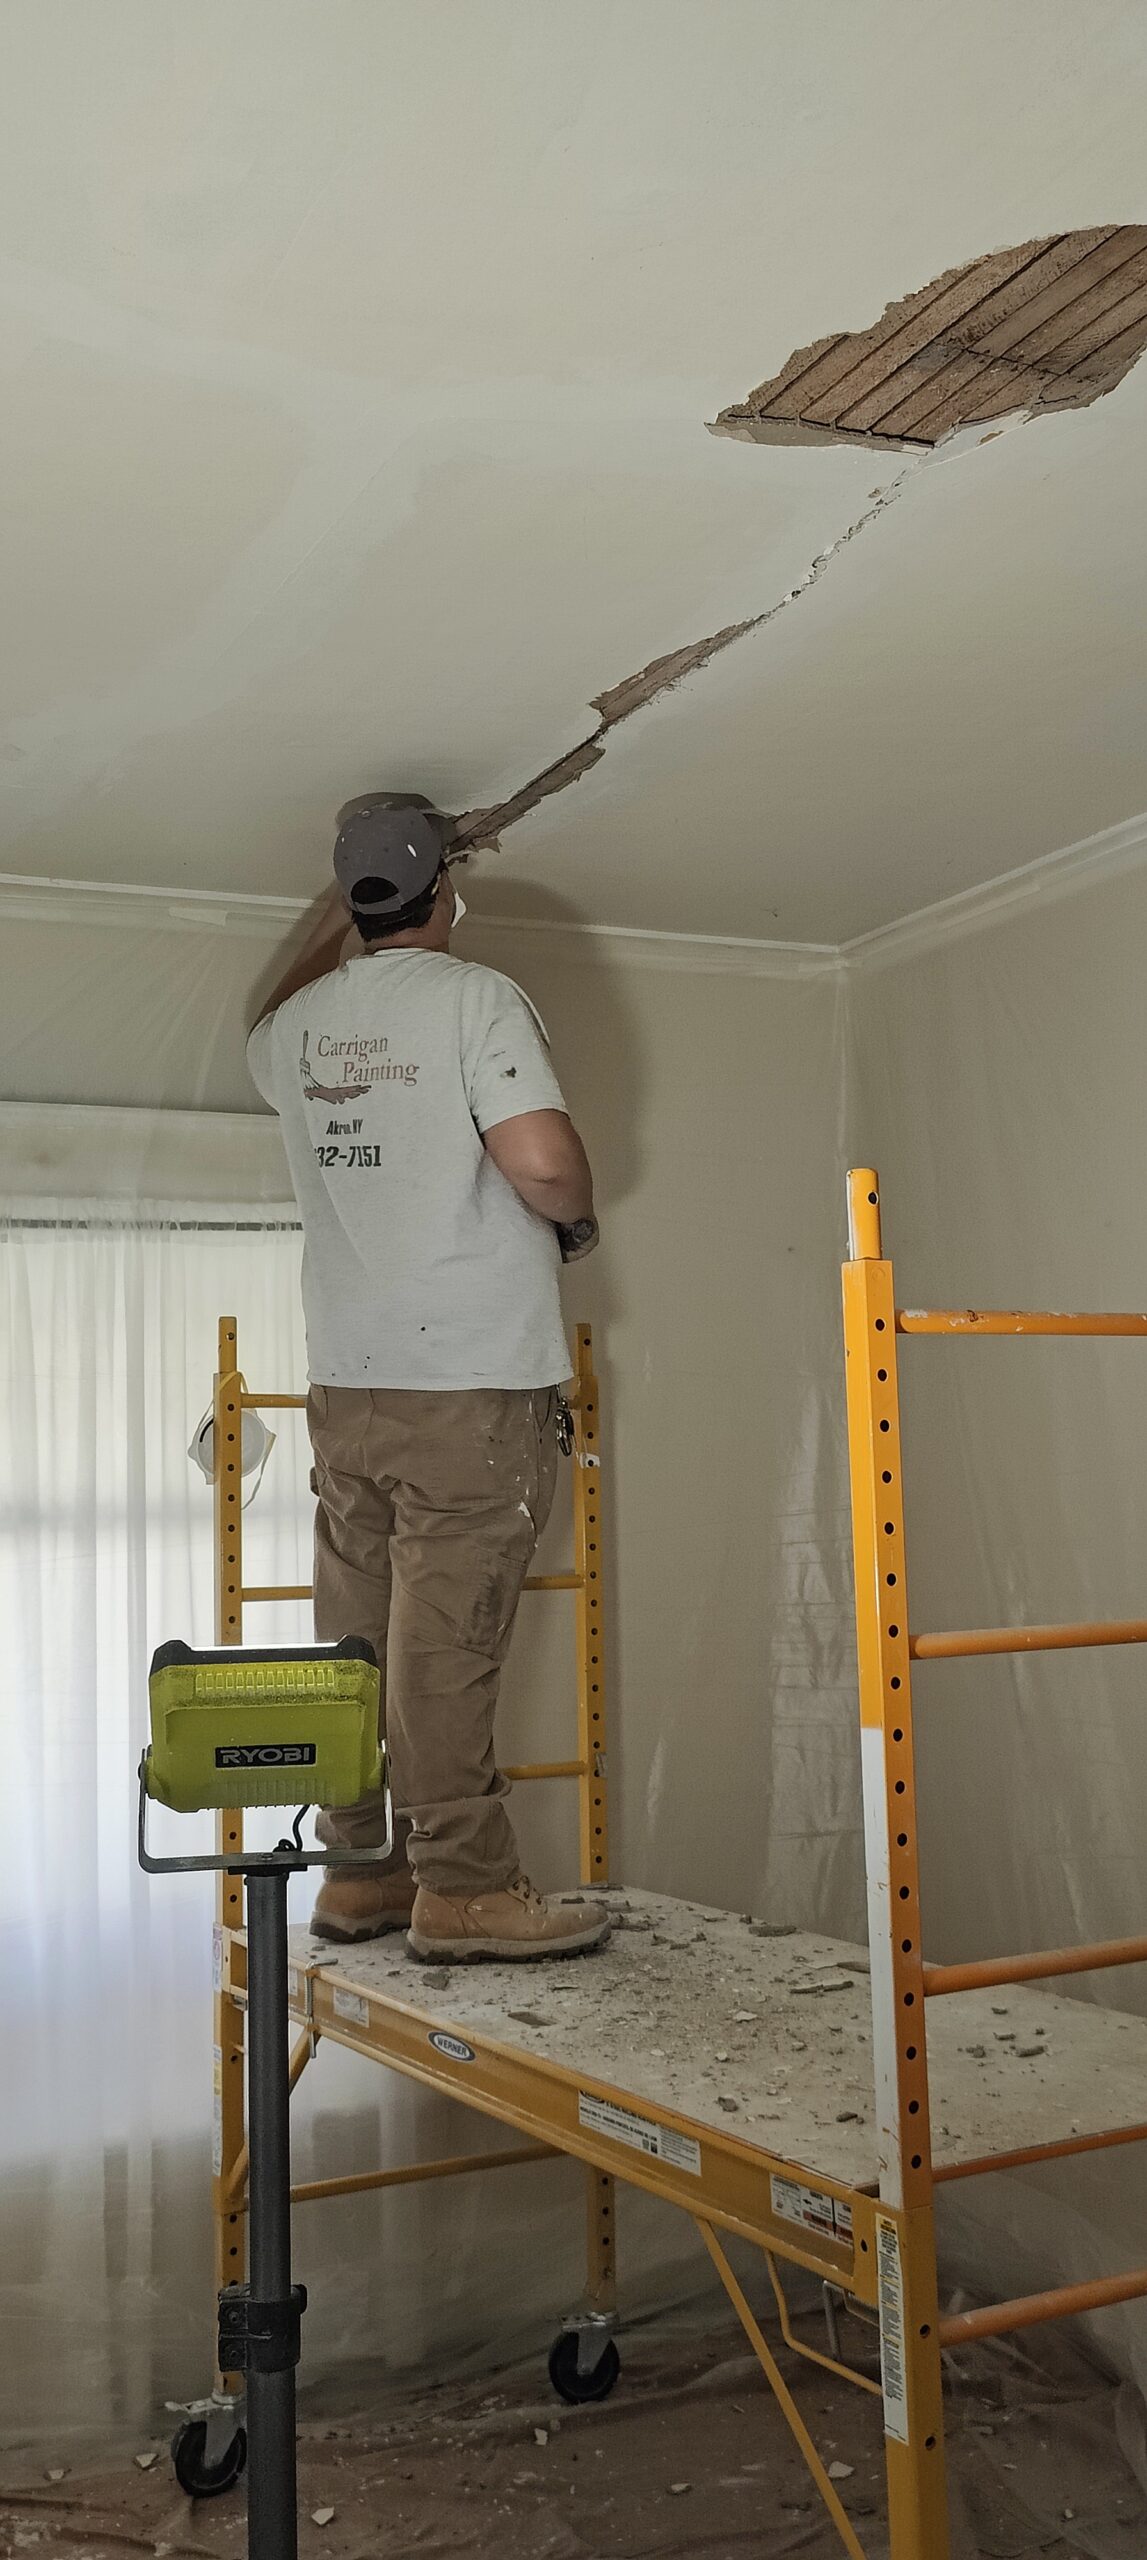
Plaster Ceiling Removal


Once the floor was fully protected, we hung plastic over the doorways to help contain the dust and dirt. After which I began by punching a hole (carefully) into the ceiling, to open up an area so I could safely work, then began the methodical removal of the plaster ceiling piece my piece.
While parts of the ceiling were still attached to the ceiling joists, large sections were not with up-to 3″ gaps between the rocklath and the ceiling joists. A worsening situation indeed. And to think two other drywall contractors they met with wanted to go over this ceiling with drywall! Yikes! This plaster ceiling weighs in at around 3,000lbs, expecting a bunch of hard, brittle drywall screws with a head the size of a #2 pencil eraser to hold a failing plaster ceiling is a big ask. It’s our opinion doing that is dangerous, and not safe.
What will eventually happen is endless nail-pops, cracks that can’t be repaired, and constant ceiling repairs to fix the band-aid. While it is expensive, its easier, safer, and cheaper in the long run to simply remove the failing plaster ceiling, and install drywall. But remove the plaster ceiling first. The plaster ceiling is already moving, drywall screws will not stop it, just delay the inevitable.


It is important to try not to touch the ceiling if its ‘stable’ until all the protection is in place, and then, using a hatchet (not a hammer) punch a hole in the ceiling to stand under and then work your way out from there. This prevents plaster falling on you. Your using a hatchet because you don’t want to cause vibrations in the plaster that could cause it to suddenly collapse – bad. The goal here is to methodically remove the plaster in a very controlled fashion so as to prevent damage to the structure or worse – injuries to yourself! These plaster ceilings are extremely heavy, and care must be taken.


New Drywall Ceiling Installation
Once the plaster ceiling was down, and the debris cleaned up, we began bringing in the drywall and hanging the sheetrock per the manufacturers directions.


10/21/25 Update:
Drywall Ceiling Finishing
Today we began taping the ceiling with mold resistant mesh tape. While many like to use paper tape for drywall finishing, we feel fiberglass mesh tape is stronger. It is also mold/water resistant so if the plumbing above this ceiling ever springs a leak, this will hopefully provide the home owners some added mold protection (which most homeowners insurance policies exclude), we can thank hurricane Katrina for that.


Plaster Wall Crack Repair
We also began repairing various cracks in the plaster walls that had been improperly ‘repaired’ before, preparing the walls for painting later this week. When it comes to cracks in plaster and drywall, the cracks must be opened, so that the new material has something to grab onto. 99% of painters in WNY lack the proper tools to deal with plaster cracks – a hatchet, Many also dont have the skill with a hatchet to be able to open a plaster crack, with out creating a hole. To do it right, you need the right force, at the right angle, to remove X amount of material, with out creating a hole. This is more difficult than it sounds.
Many painters, won’t even bother cleaning out the crack with a 5in1, they often will just cover it with a piece of paper or mesh tape, mud over it and call it “fixed”. Does this look fixed to you?


The above two photos show the way our competition repairs plaster wall cracks, the picture below is how to properly repair a plaster crack. Our way will last forever as long as there is no new movement, their way lasted less than a year.

We also chiseled out various other cracks in the walls around the room, and we also repaired some minor water damage in a corner.


Again we see they used paper tape here as well. We scraped off the paper tape, and used a hatchet to open the crack. Then back filled the cracks with Durabond and mesh tape for a strong lasting repair.

We also installed the new crown molding. Tomorrow we will finish the ceiling, sand it, and then prime the ceiling. Check for defects in our work (We are not perfect), make any needed touchups to our finishing, spot prime those repairs and then paint the ceiling. We will also finish the cracks we began repairing today, and get those read for painting as well.
10/22/25 Update:
Sanding and Priming
This morning after applying the last skim coat to the ceiling seams and butt-joints, we sanded the ceiling prior to priming and painting of the new ceiling. Tomorrow, we will fix any defects we don’t like (we saw a few), spot prime those areas, and then apply a second coat of paint to the ceiling, and new crown we installed. We will also sand, spot prime the wall patches, and then paint the walls


Priming and Painting

Update: 10/23/25
After priming and painting the ceiling, we discovered some areas we were not happy with, so we made the necessary repairs. We also painted the baseboards, window frames, and fireplace even though they were not originally included, it will just make for a better job.


Update: 10-25-25
All Done!
Looks fantastic. There were a few areas on the ceiling that we didnt like after painting the ceiling, so we touched up those areas and repainted the ceiling. We also sanded, and painted all the trim in the room to complete the transformation. We applied a total of 3 coats of paint to the ceiling, two coats of paint to the new crown, and 2 coats of paint to the rest of the trim in the room.
The previous painters, painted latex directly over oil, which caused the paint on the fireplace to peal in some areas when we pulled the plastic. It is important to note that Paint and Primer in one can is a marketing gimmick. Primer and paint have distinct properties that can not be adequately mixed in a single product. If you have oil trim, and wish to switch to a waterborne paint, you must sand, and prime the oil trim first using a high quality dedicated solvent based primer.


Before and after


Emergency Ceiling Replacement Review
David W.
Carrigan Painting saved us a lot of trouble by correctly diagnosing what was wrong with our plaster ceiling. Two drywall contractors proposed covering the cracking plaster with drywall.
Dave knew better: the ceiling could not be kept in place by merely covering it. In fact the rock lath plaster was not even attached to the floor joists above in large areas of the ceiling. While that meant we had a much bigger and more costly job to do, it would be done right the first time.
Carrigan Painting quickly completed demolition with great dust control. The drywall replacement was efficiently done. They prepped and painted the ceiling, the new crown molding and walls with excellent results. Every aspect of the job was done to the highest standards. Clean up was top notch. Communication was clear and easy. They were a pleasure to work with. I would definitely hire them again.
Snyder NY 14226
2025
⭐⭐⭐⭐⭐